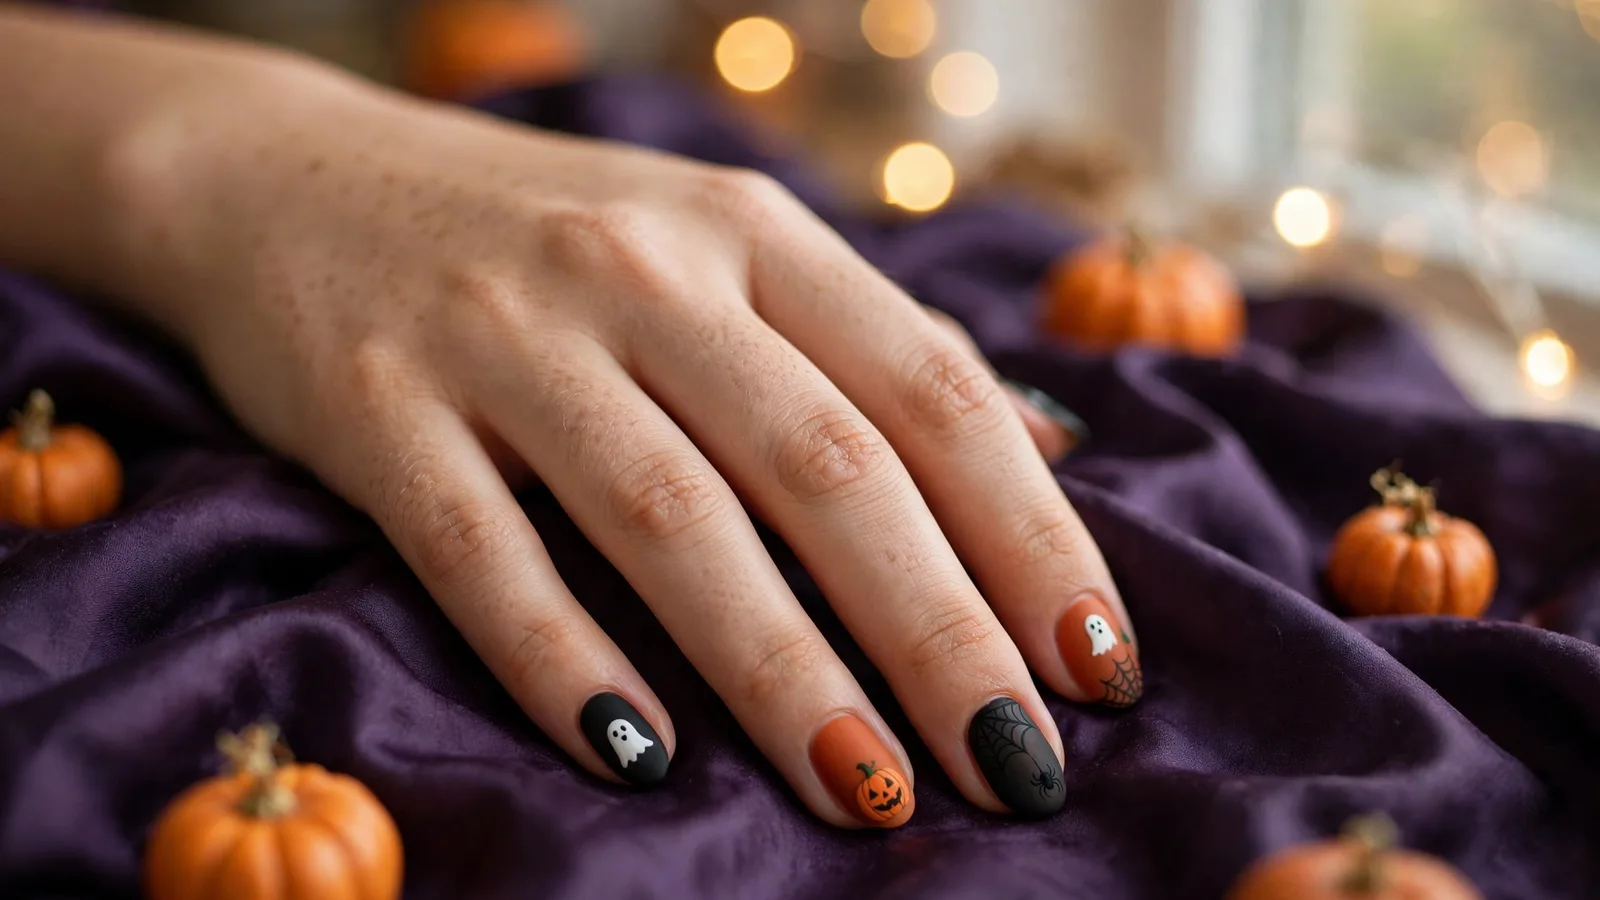
Easy Halloween nails are beginner nail designs you can finish in 5 to 15 minutes with basic tools like a dotting tool, stickers, or striping tape. This guide gives you 18 of them — ghosts, pumpkins, spiderwebs, mummies, and more — each with a real time budget, the exact technique, and the best nail shape to wear it on.
How Long Do Easy Halloween Nails Take?
Most easy Halloween nails take 5 to 15 minutes for a full set of ten once your base color is dry. Sticker and press-on designs take under 5 minutes; dotting-tool ghosts and striping-tape designs take about 10; stenciled scenes need closer to 15. Use the table below to pick a design that fits the time you actually have tonight.
| Your time | Go for | Designs in this guide |
|---|---|---|
| Under 5 minutes | Stickers, decals, solid-color skittles, simple dots | Ghost dots, candy corn tips, skittles, sticker pumpkins, spider-drop accent |
| About 10 minutes | Dotting-tool art, striping tape, sponge ombre | Spiderwebs, mummy wrap, eyeballs, tiny bats, ombre, cat face, blood-drip tips |
| 15 minutes | Stencils, layered scenes, multi-step art | Haunted moon stencil, pumpkin patch, tape spider French, ghost moon, glitter webs, witch hat |
The Beginner Toolkit: 7 Things That Make It Foolproof
That kit costs under $15 and covers every design in this easy Halloween nails guide.
- Double-ended dotting tools (5-piece set): Ten ball sizes for ghosts, eyeballs, pumpkin dots, and spider bodies — no drawing skill needed. Sets from brands like Teenitor cost a few dollars.
- Thin striping brush: A long, skinny brush for spider legs, web lines, and mummy wraps. The Sally Hansen Nail Salon Pro Tool Kit bundles one with a dotting tool and stencils in a single box.
- 1mm striping tape: Self-adhesive tape for perfectly straight lines — mummy wraps and French-tip guides. Peel it off while the polish is still tacky.
- Halloween water decals or nail stickers: The zero-skill shortcut. Soak decals 20–30 seconds, slide on with tweezers, seal with top coat. (Our nail stickers guide covers application and wear.)
- Slanted tweezers: For placing stickers, decals, and tape precisely. Fingers are too clumsy for pieces this small.
- Fast-dry top coat: A quick-dry formula like Sally Hansen Insta-Dri seals art, adds shine, and stops you smudging the design you just painted.
- Cleanup brush + acetone: A flat angled brush dipped in remover erases polish on skin and sharpens edges — the step that makes DIY look salon-done.
Prefer to skip polish entirely? Press-ons are the fastest route of all — our artificial fingernail supplies guide lists what to buy for a starter kit.
18 Easy Halloween Nail Designs, Grouped by Time Budget
Each of these 18 easy Halloween nails designs lists a realistic time for a full set of ten at beginner speed, drying time between coats not included. Paint your base color first, let it dry fully, then start the art.
Under 5 Minutes: Party-Night Rescue
These five easy Halloween nails are the ones to pick when the party is tonight and your nails are bare. No special skills, no drying-time anxiety.
1. Ghost-Face Dots on Matte Black
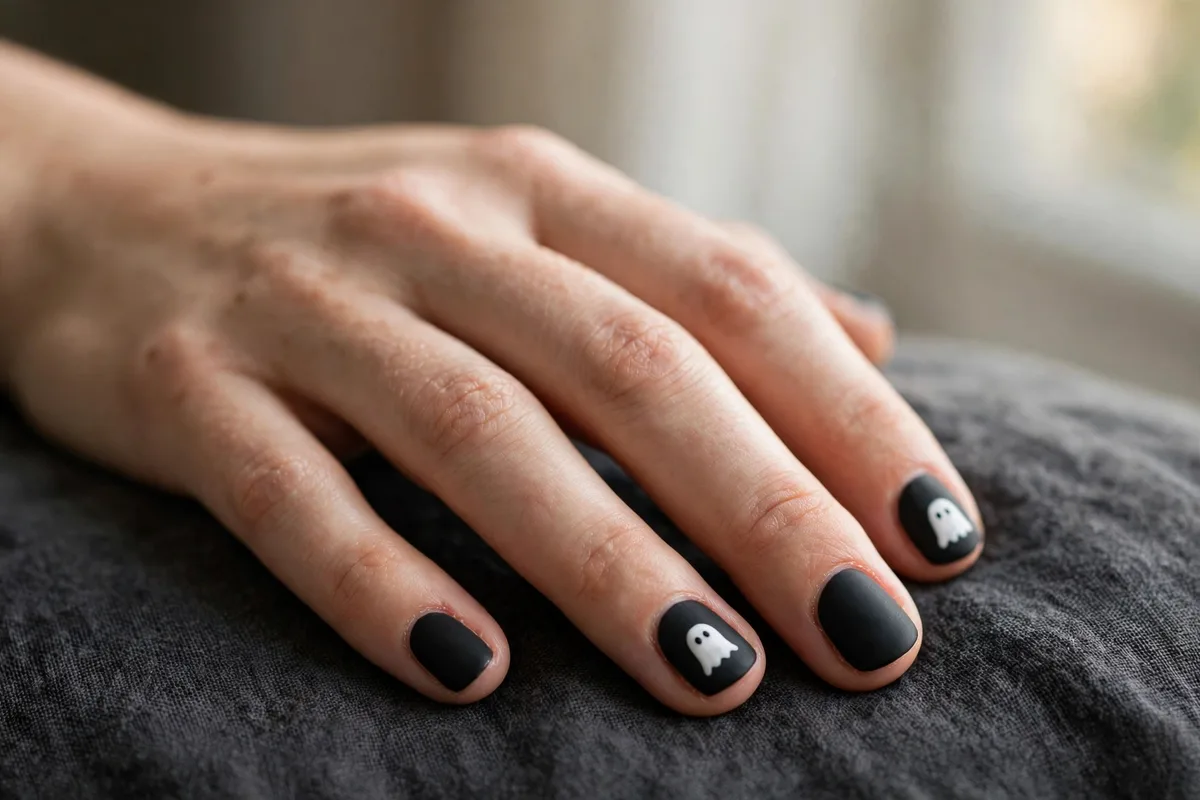
A matte black base with white ghosts on two or three accent nails — the classic beginner win. Use the large end of a dotting tool for the body, drag slightly downward for the tail, then add two tiny black eyes with the small end. Matte top coat keeps it spooky instead of shiny. Best on short squoval or almond nails, where the small canvas keeps ghosts cute.
2. Candy Corn Tips
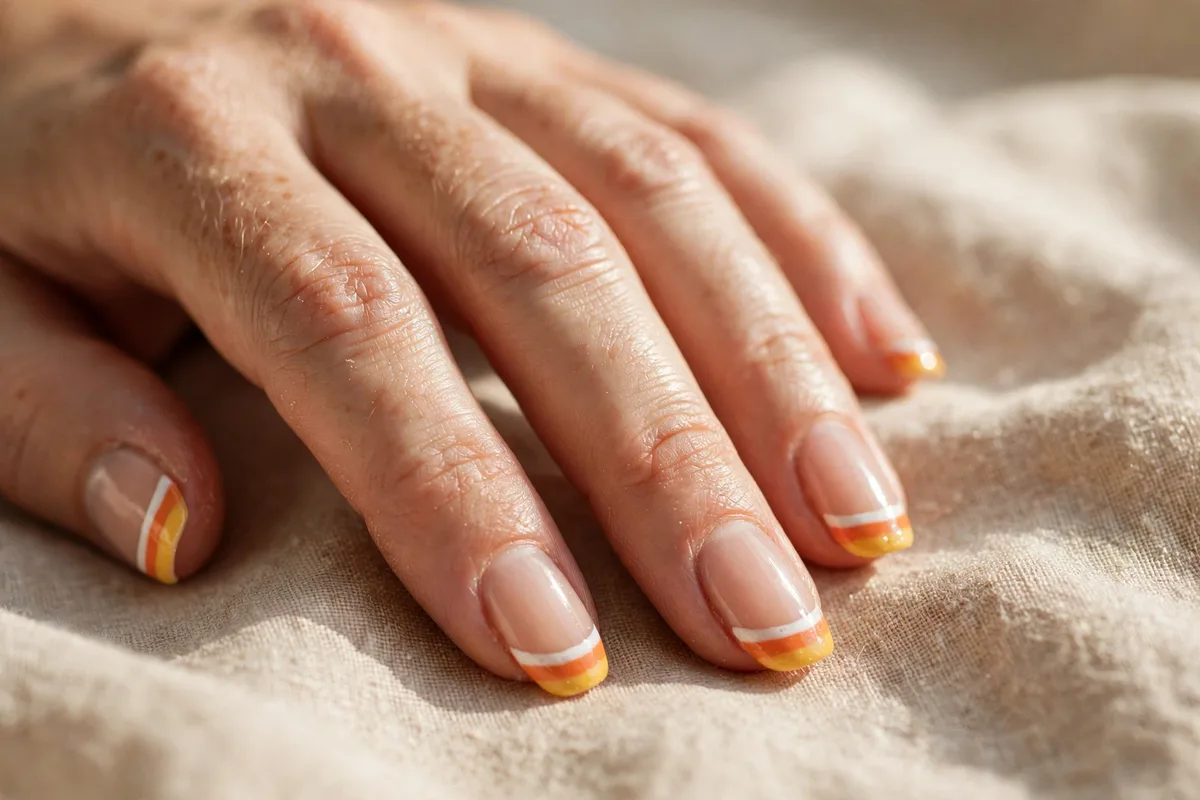
A nude base with tips painted in three bands — white, orange, yellow — like the candy. Paint each band straight across the tip with the polish brush, working light to dark so mistakes hide under the next layer. Sharpen the smile line with your acetone brush. Best on medium almond or coffin nails, with room for all three bands.
3. Halloween Skittle Mani
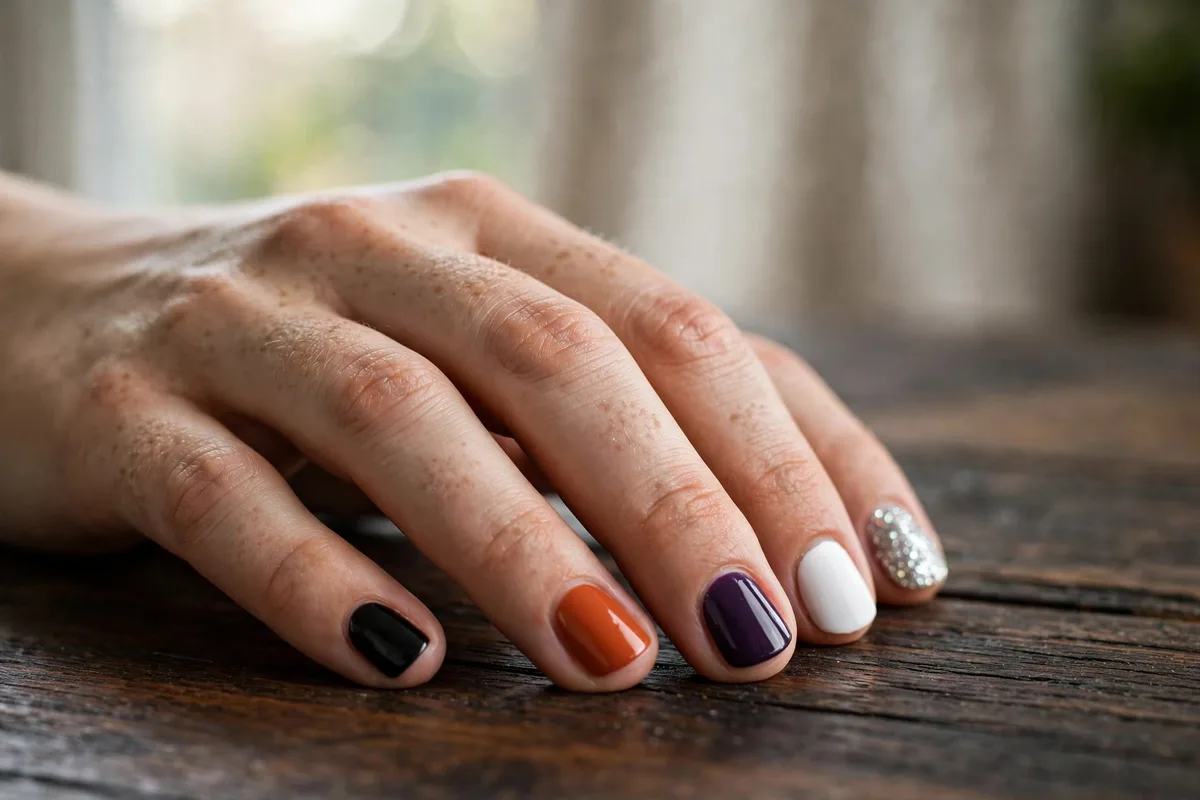
Each nail a different solid: black, orange, deep purple, white, plus one glitter accent. Zero art involved — the Halloween read comes entirely from the palette. Keep the glitter to the ring finger so it looks intentional. Best on any length or shape, including very short nails.
4. Sticker Pumpkins on Nude
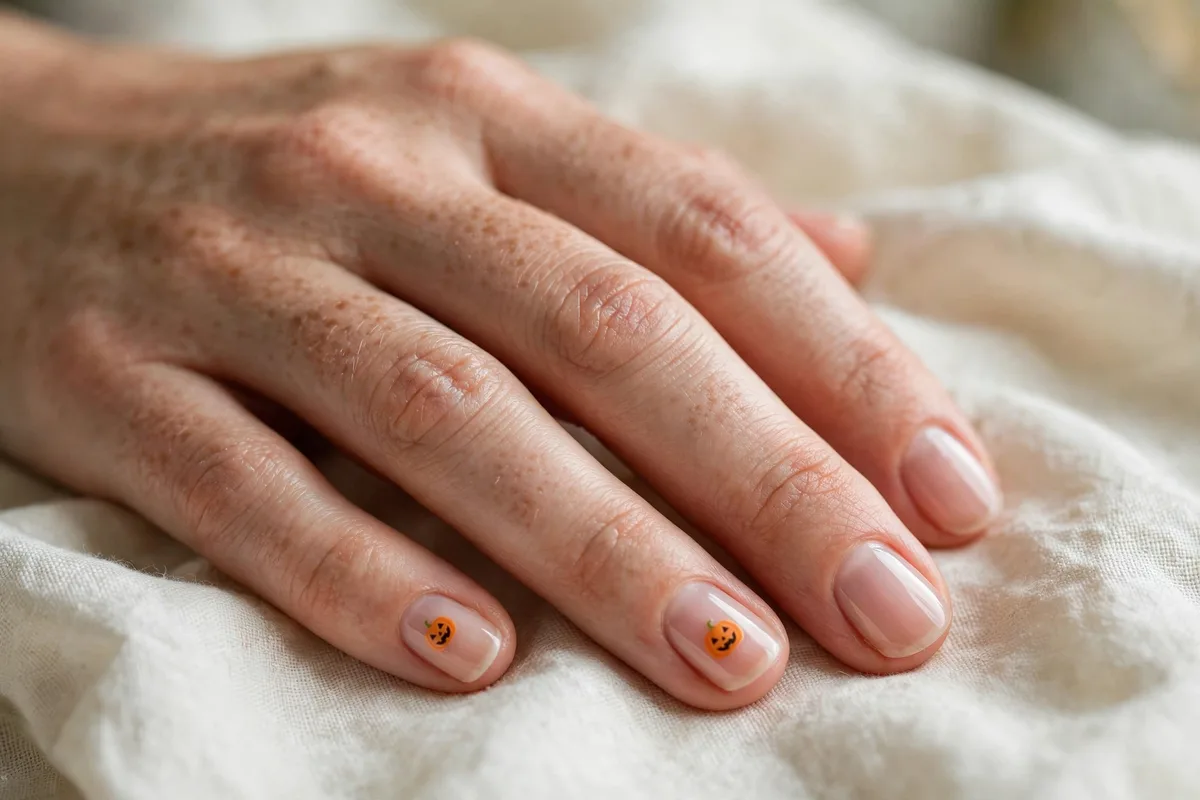
Among all easy Halloween nails, stickers are the fastest path to a detailed look. Paint a sheer nude base, soak pumpkin decals 20–30 seconds, slide each into place with tweezers, press out bubbles with a fingertip, and seal with two thin top coats. Looks hand-painted from a foot away. Best on short natural nails.
5. Spider-Drop Accent
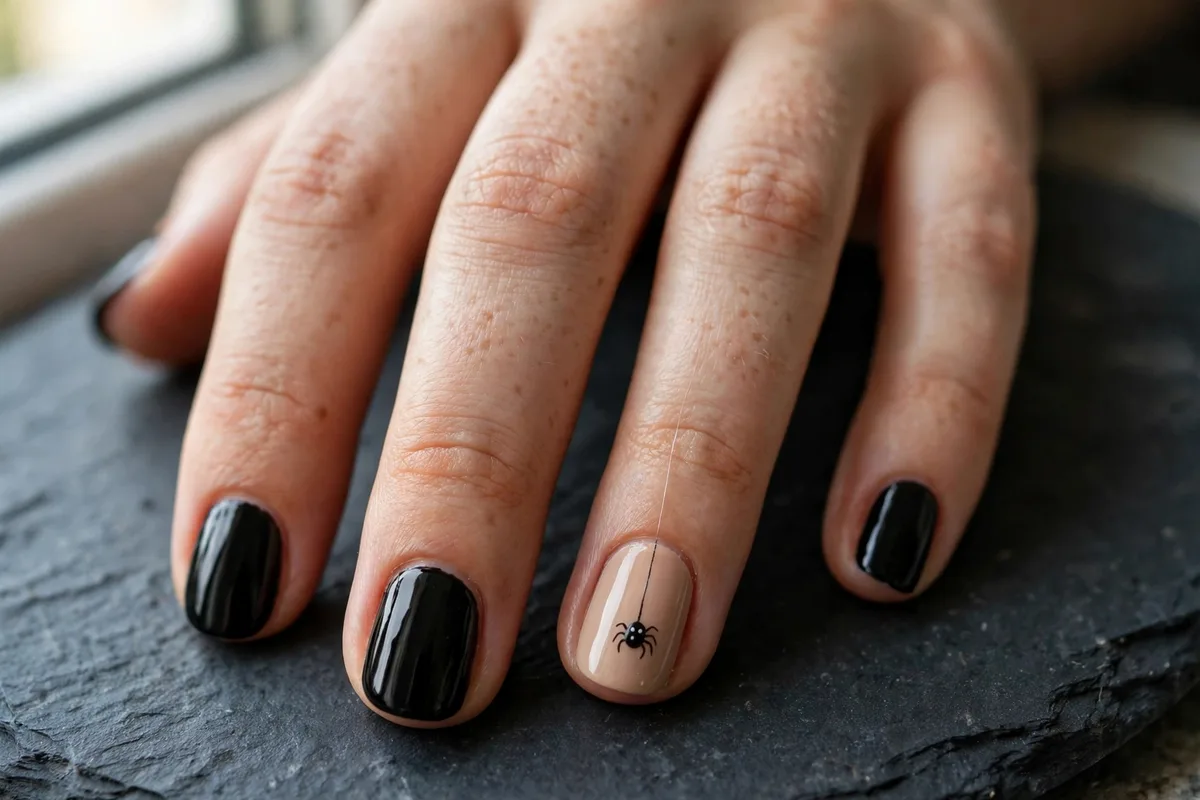
Nine solid black nails plus one nude accent with a spider dangling from the cuticle on a thread. Dot the body with a dotting tool, draw the thread and eight legs with a striping brush — legs do not need to match. One accent nail carries the theme while the rest stay simple. Best on short to medium nails.
About 10 Minutes
These 10-minute easy Halloween nails need a dotting tool or striping brush, but the techniques are dots and straight lines — nothing requiring an artist’s hand.
6. Spiderweb Corners
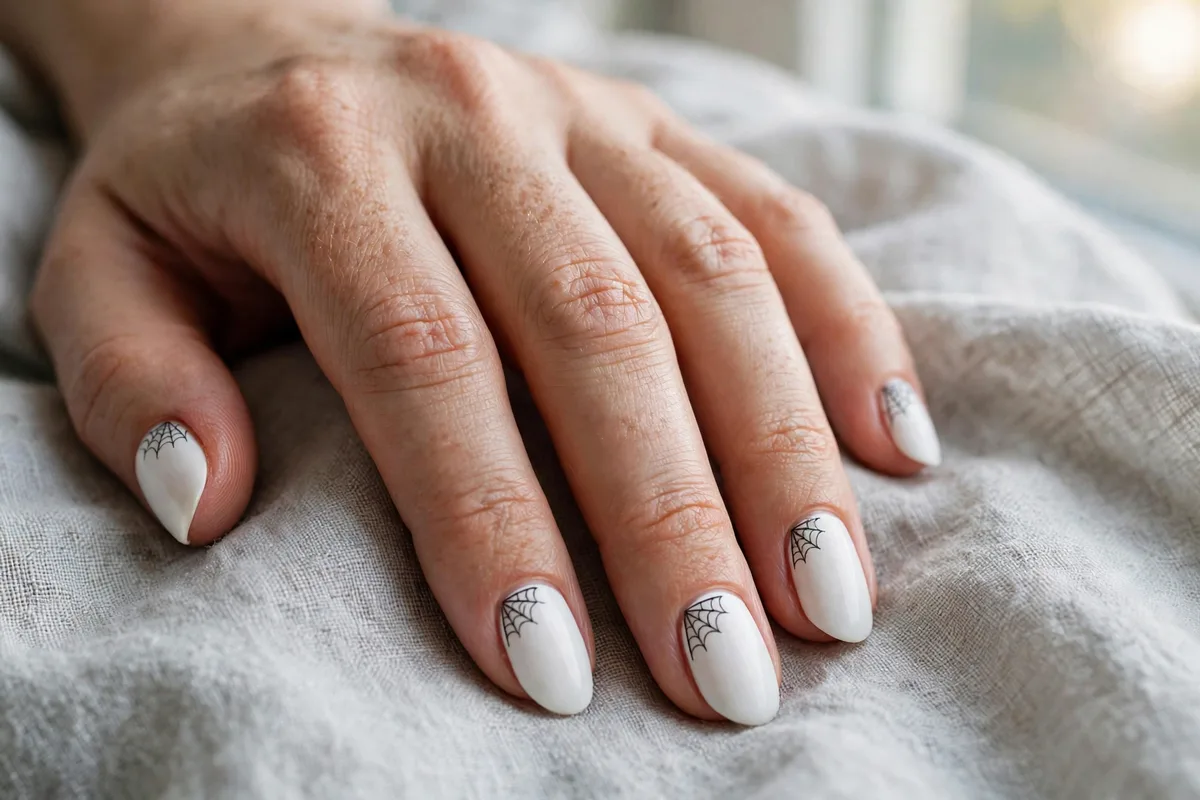
A crisp white base with a black web spun from one corner. Draw three straight lines radiating from the corner with a striping brush, then connect them with small curved arcs — wobbles read as organic webbing. Add a tiny dotted spider on one nail. Best on medium almond or oval nails.
7. Mummy Wrap
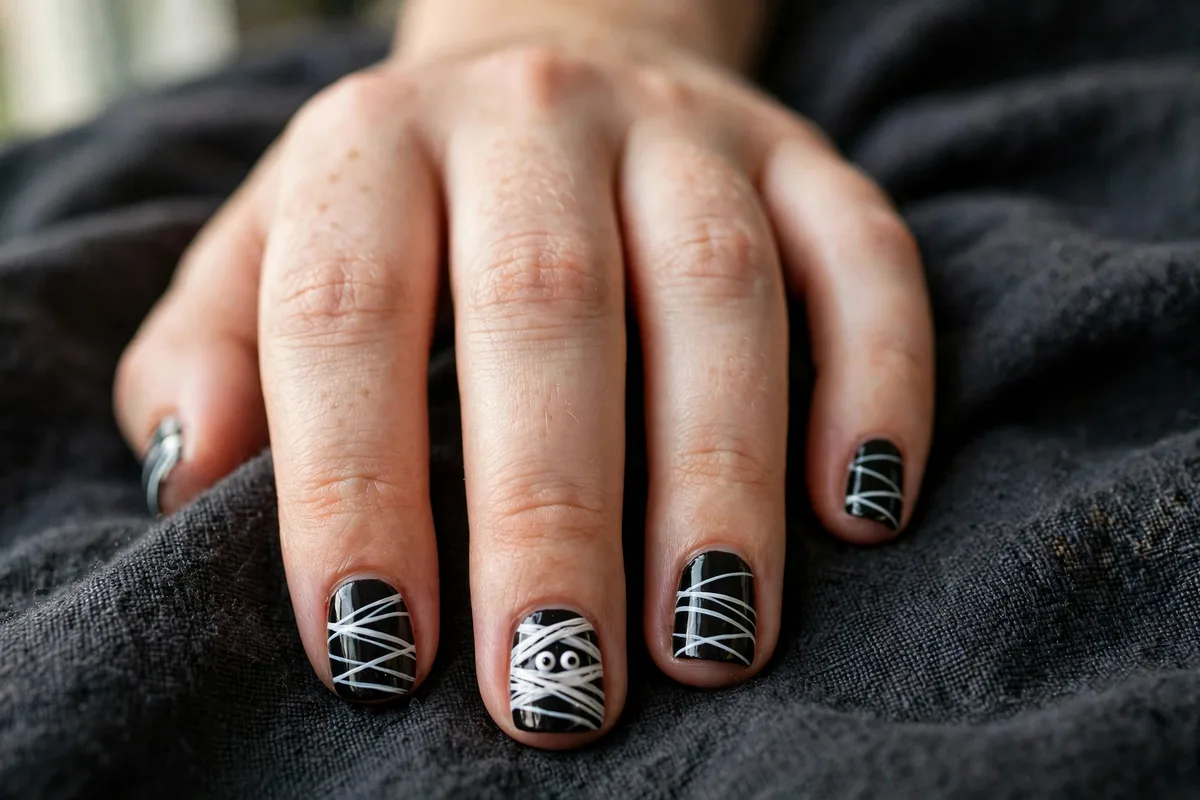
A black base crossed with diagonal white strips like mummy bandages, two dotted eyes peeking through a gap. Lay 1mm striping tape or paint strips with a striping brush, leaving a horizontal gap near the tip for the eyes. Two white dots plus smaller black pupils finish it. Best on short to medium square nails.
8. Eyeball Dots
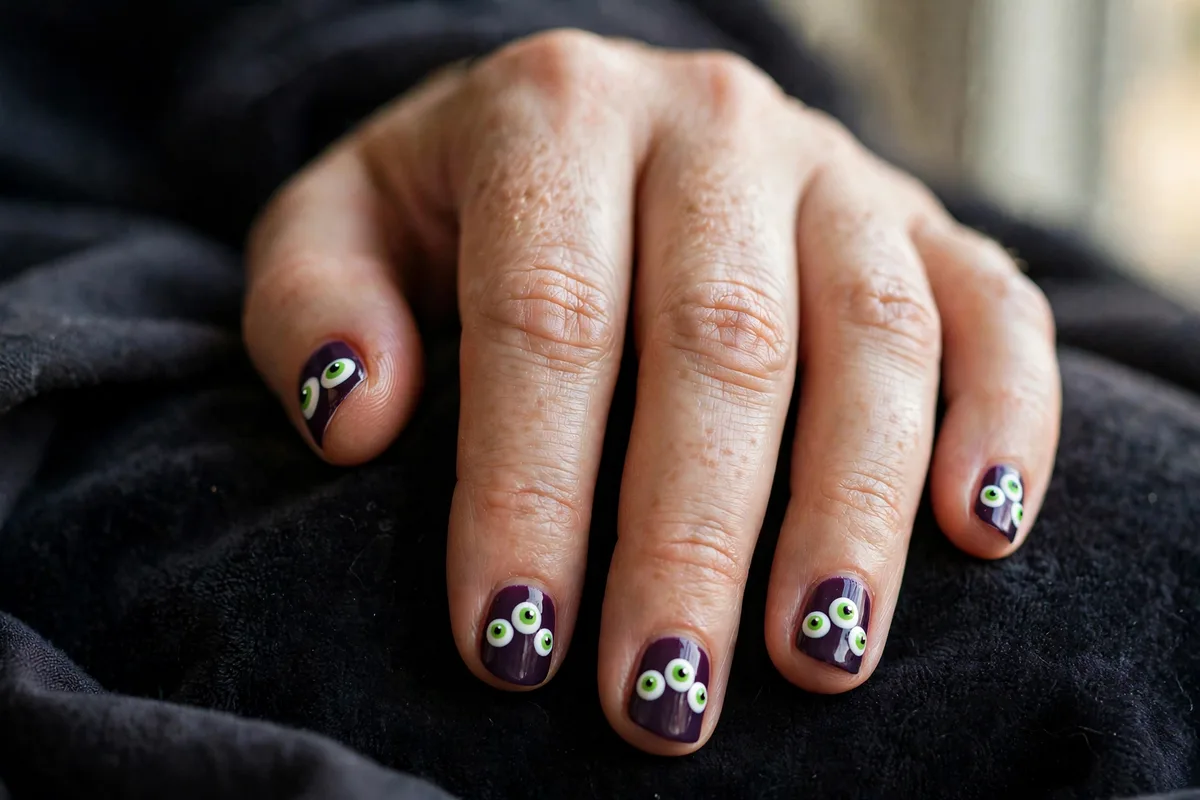
Layered dots build a cartoon eyeball: big white dot, smaller colored dot on top (green or orange), tiny black pupil. A 5-piece dotting set gives you all three sizes without switching tools. Two or three eyeballs per nail on dark purple or black. Best on short nails.
9. Tiny Bats on Nude
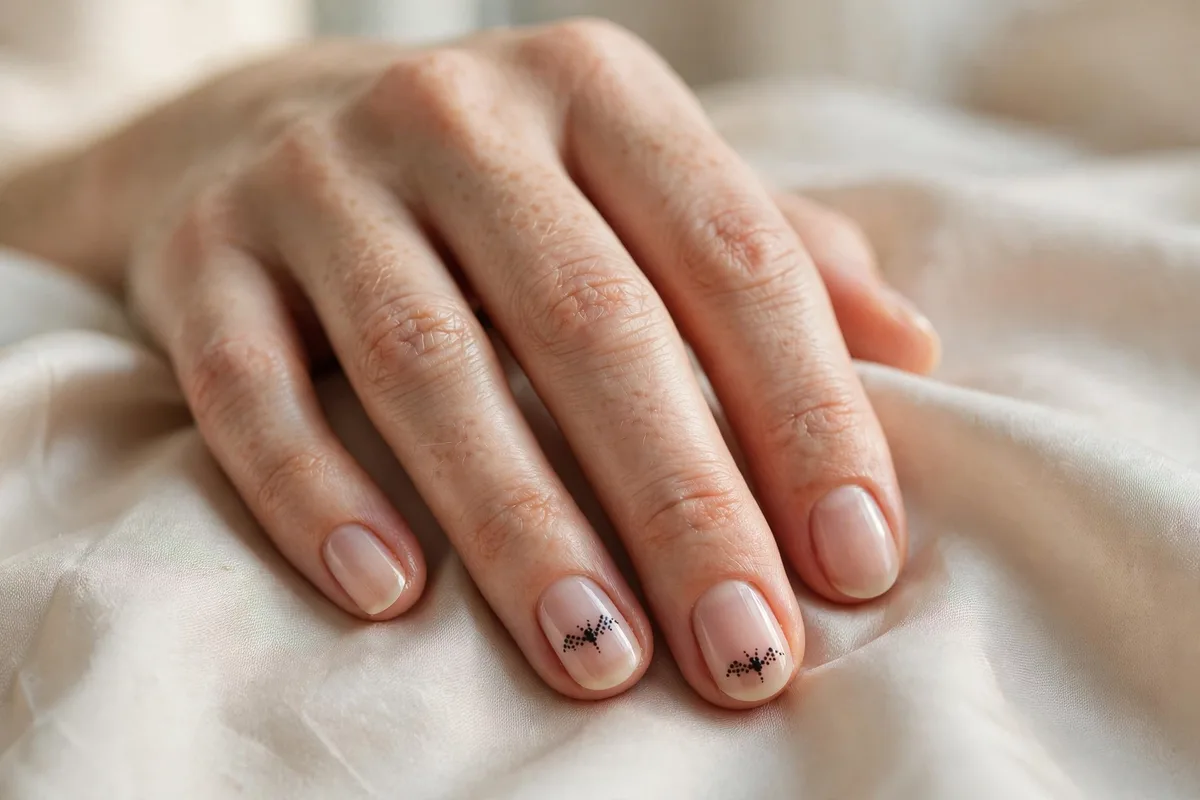
Sheer nude nails with small black bat silhouettes. Each bat is three dots: body, two wing dots dragged outward, plus triangle ears with a striping brush. Keep bats to two or three nails and leave the rest bare. Best on short oval nails, where the negative space keeps it chic.
10. Black-to-Orange Ombre
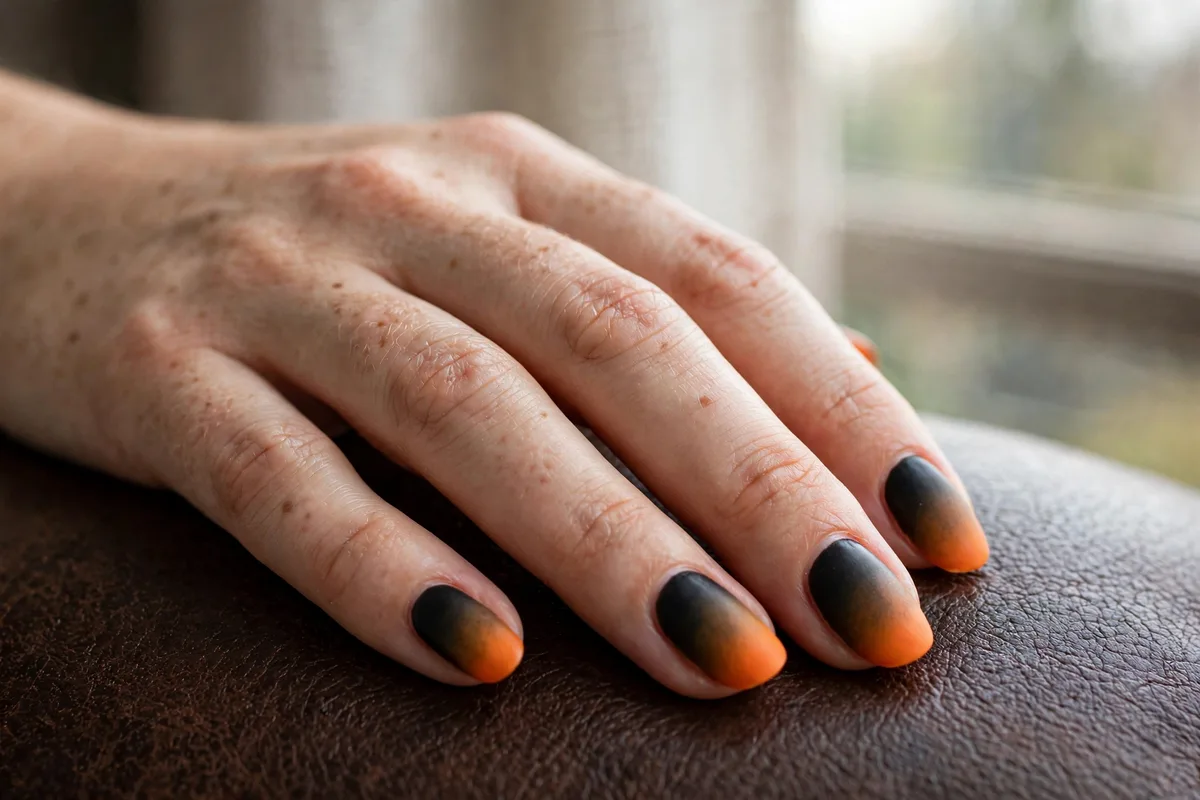
A sponge-blended fade from black at the cuticle to pumpkin orange at the tip — zero drawing. Paint white first so colors pop, dab black and orange onto a makeup sponge, and bounce it on in thin layers. Clean up with your acetone brush. Best on medium-length nails.
11. Cat-Face Accent
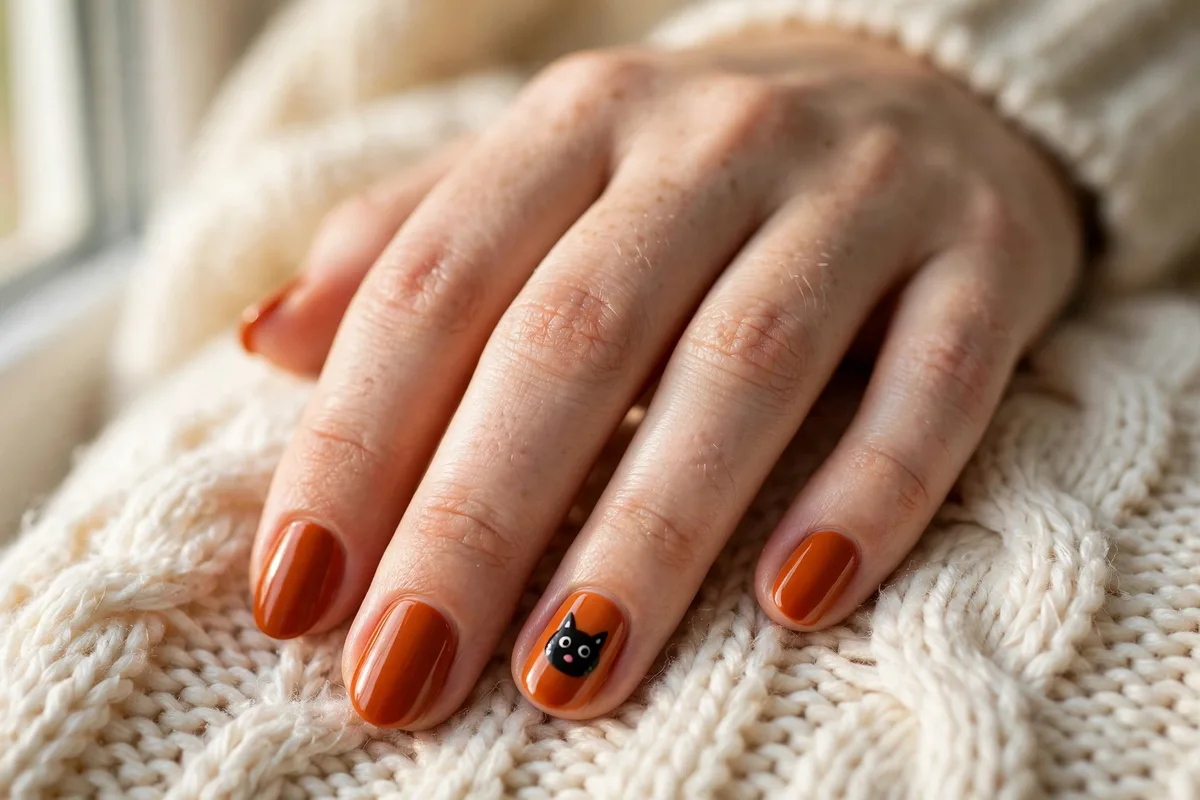
Solid burnt-orange nails with a black cat face on the ring finger. One big dot for the head, two triangle ears with a striping brush, white dot eyes, a tiny pink nose. The rest stay plain orange so the accent pops. Best on short to medium almond nails.
12. Blood-Drip Tips
Nude nails with glossy red polish dripping from the tips. Paint the tip red, pull thin drips toward the cuticle with a striping brush, varying lengths so it looks liquid. Glossy top coat sells the wet effect — skip matte here. Best on medium to long nails.
15 Minutes: Full Scenes
Each of these 15-minute easy Halloween nails layers two or three techniques, but every layer is still beginner-level. Put on a podcast and take it one nail at a time.
13. Stenciled Haunted Moon
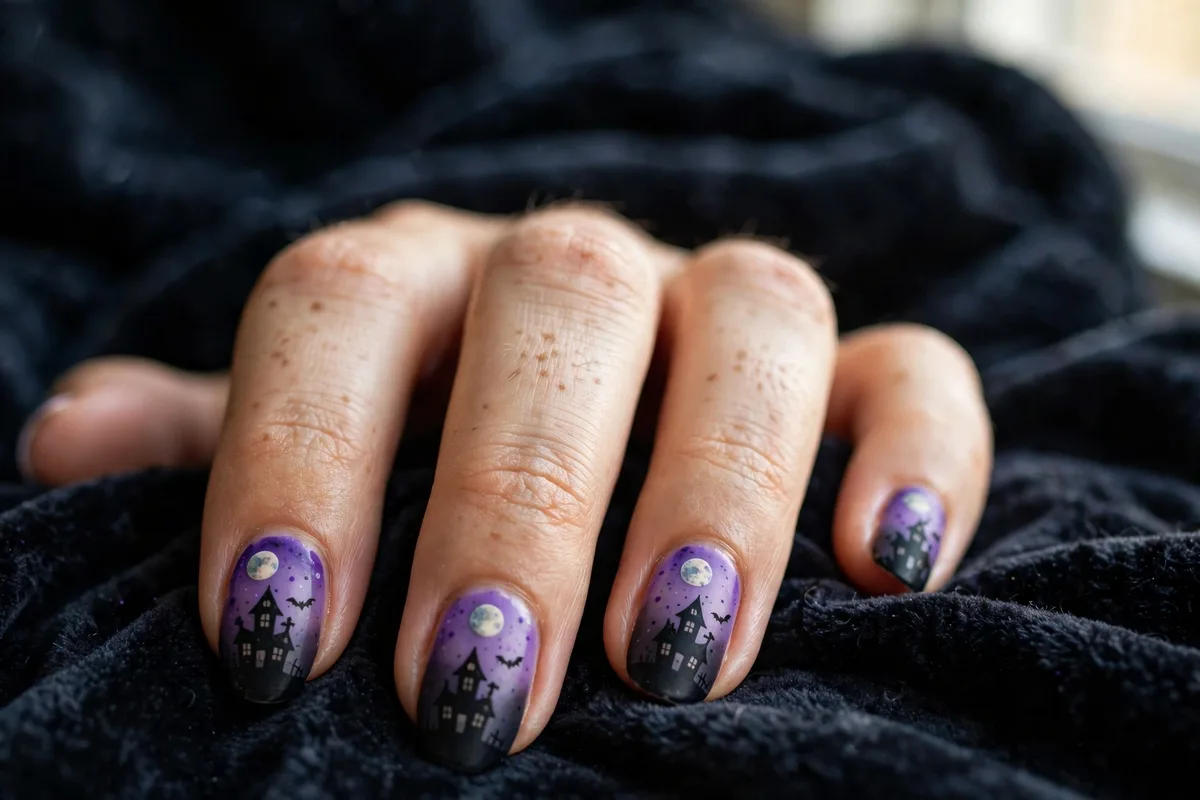
A full haunted scene with no freehand drawing. Sponge a purple-to-black gradient, press a moon-and-house stencil firmly on (Whatsupnails makes Halloween sets), and dab black polish over it. Peel while tacky for crisp edges. Best on medium to long nails.
14. Pumpkin Patch
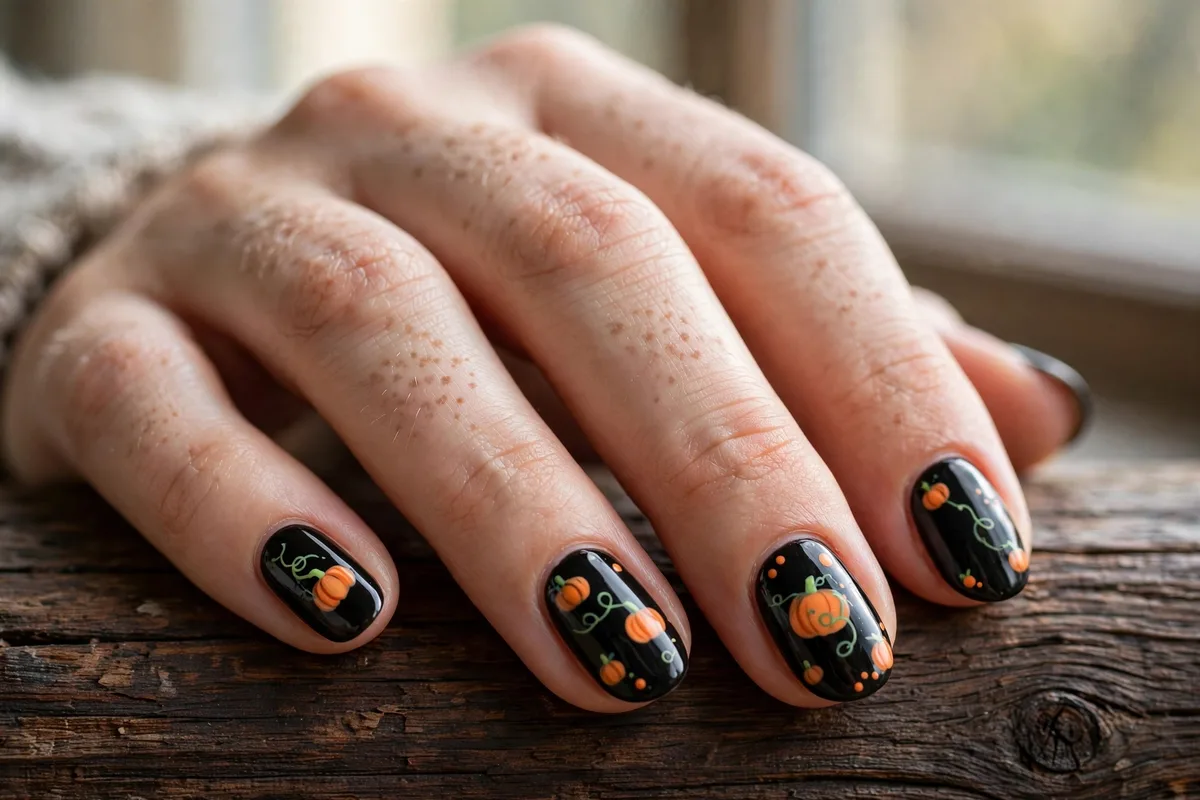
Orange pumpkins with green curly stems on black. Each pumpkin is one squashed orange dot, a small green dot for the stem, a curled vine line. Vary sizes across nails so it reads as a patch, not a pattern. Best on medium oval nails.
15. Striping-Tape Spider French
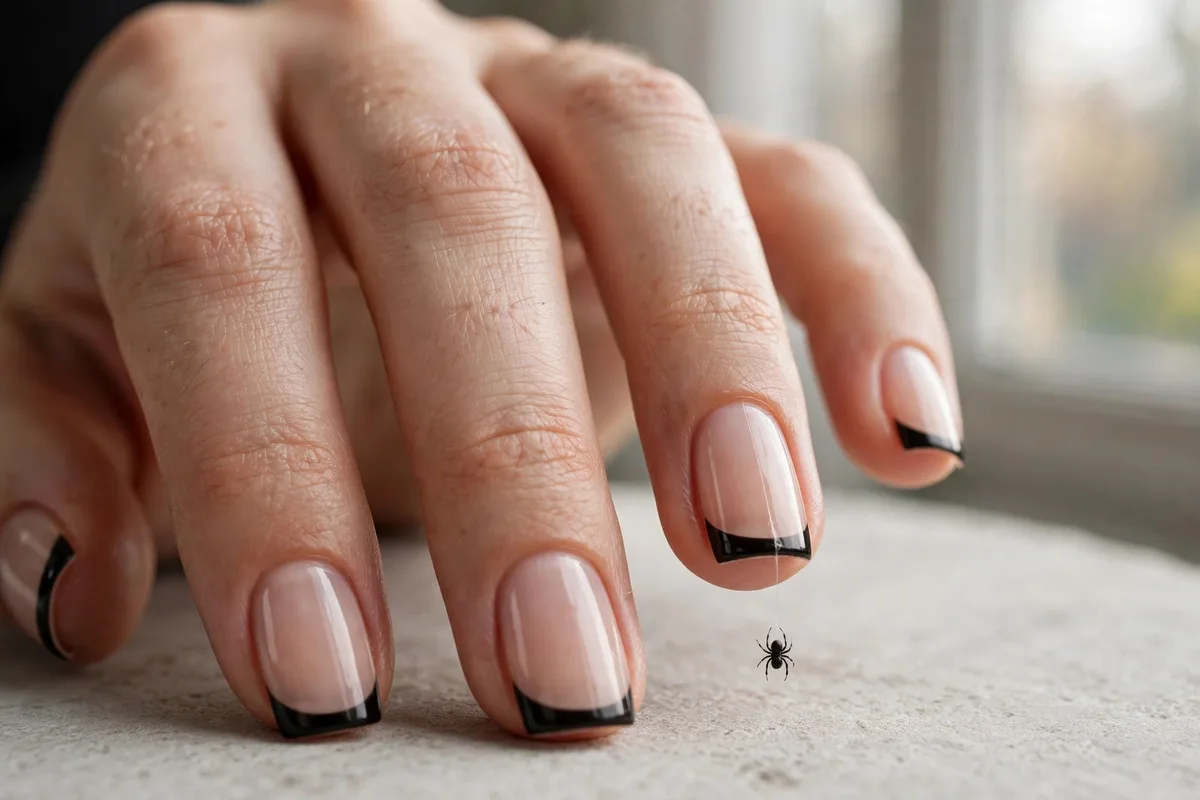
A black French tip with a spider hanging from it. Use striping tape as a guide for a sharp smile line, paint the tip black, then add the dotted spider and thread below. The tape does the hard part — the line work. Best on medium square or coffin nails.
16. Ghost in the Moon
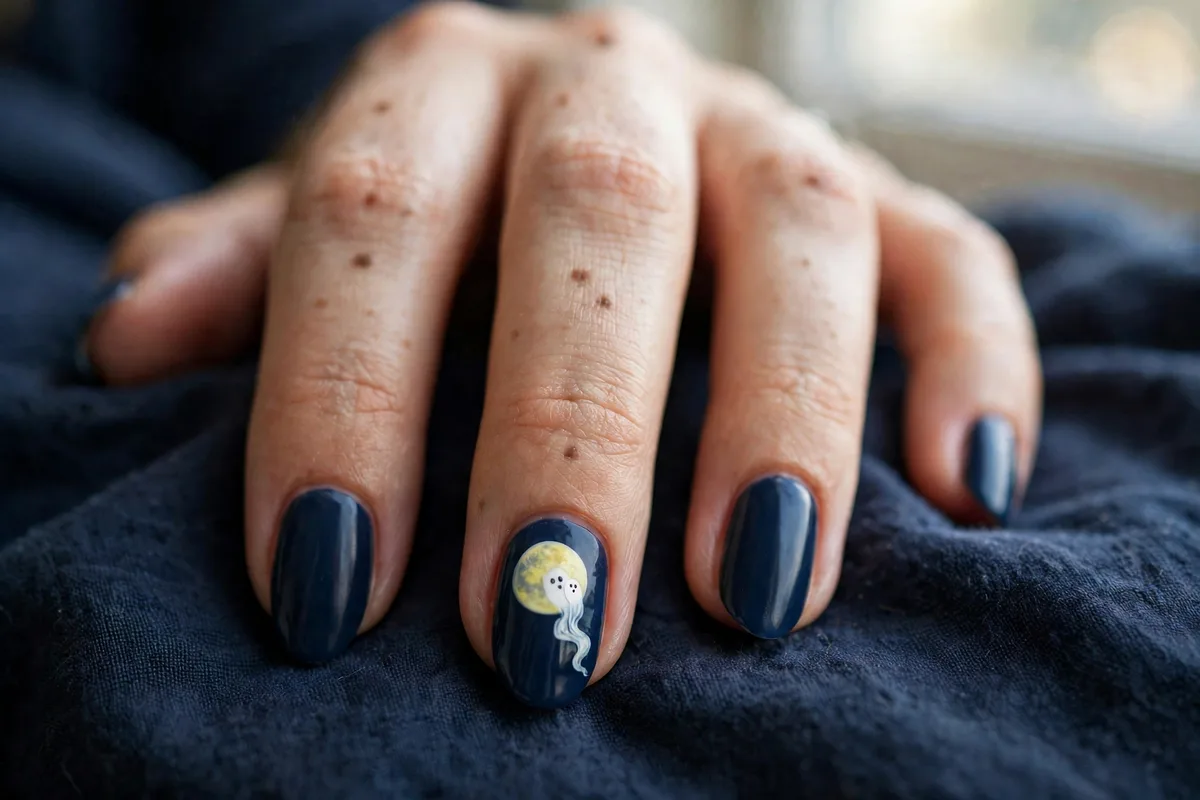
Midnight-blue base, big full moon, white ghost floating across. Sponge a pale yellow circle for the moon, paint the ghost with two overlapping white dots and a dragged tail, dot the eyes once dry. The dark background makes the white shapes glow. Best on medium to long almond nails.
17. Glitter Spiderweb on Plum
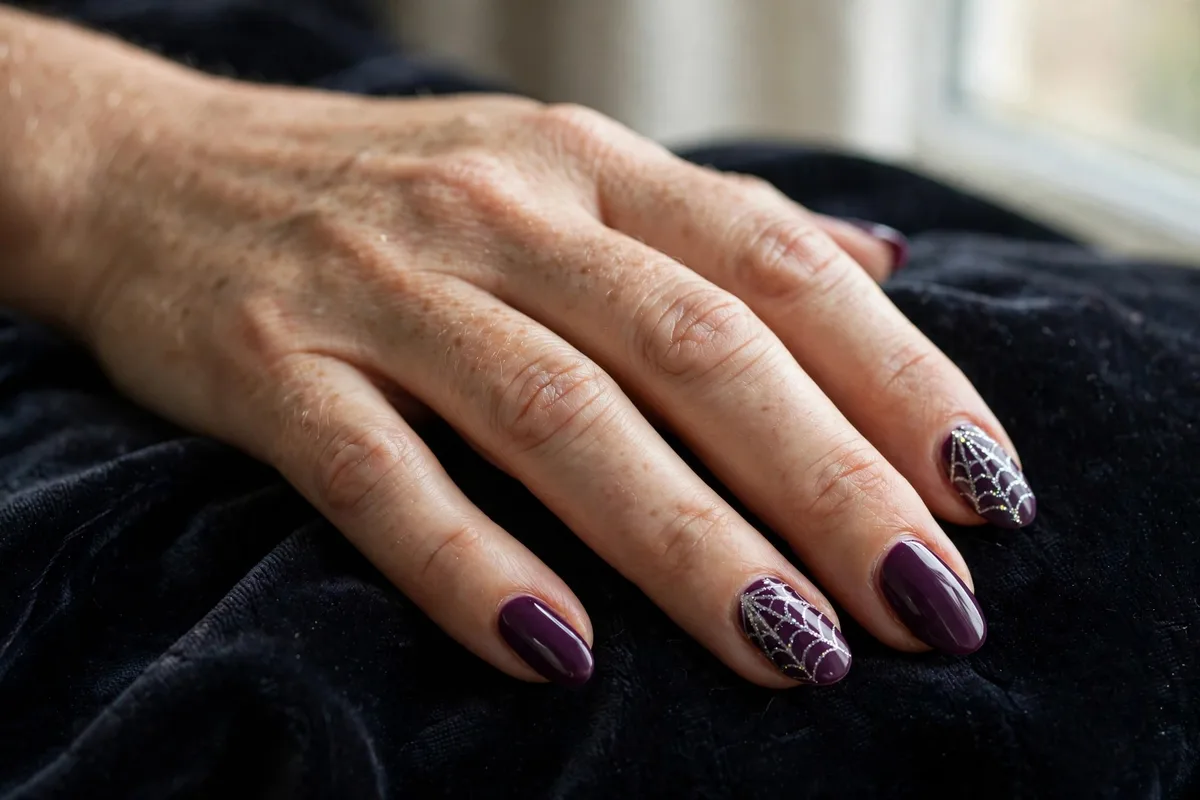
Deep plum nails with a silver-glitter web on accent fingers. Paint web lines with a striping brush dipped in glitter polish — or draw the web in black first and trace over it once dry. Glitter catches party light beautifully. Keep the web to two accents so the plum stays the star. Best on medium-length nails.
18. Witch-Hat Accent
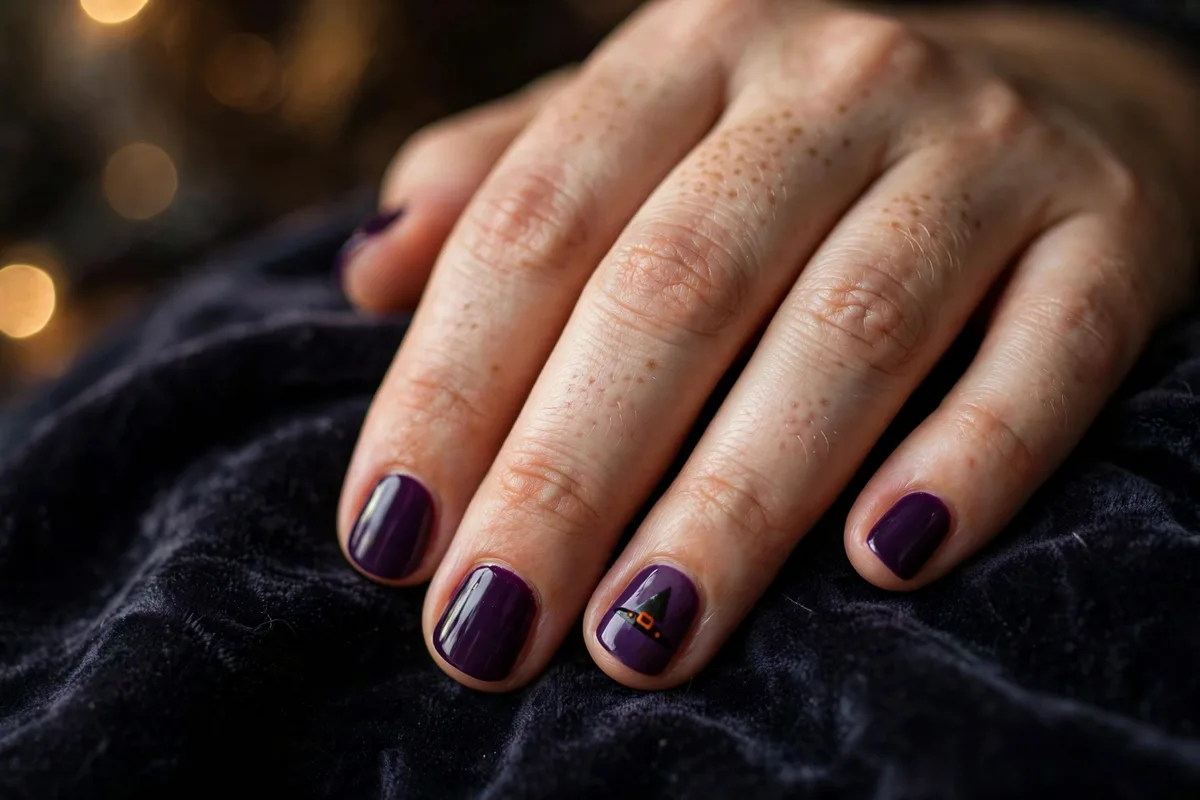
Solid purple nails with a witch hat on the ring finger: a black triangle (two striping-brush strokes), a brim line, a small orange dot buckle. Three shapes, one recognizable silhouette. Best on short to medium nails — the simple shapes scale down well.
📌 Found your favorite?
Pin these easy Halloween nails to your Halloween board so your design shortlist is waiting when party night arrives.
How Do I Make My Easy Halloween Nails Last Through the Party?
Easy Halloween nails last through the night — and the weekend — with the right prep: push back cuticles, dehydrate the nail plate with alcohol, apply a sticky base coat, cap the free edge with every layer, and finish with two thin top coats instead of one thick one. Here is the routine that actually works.
- Prep like a tech: push back cuticles and wipe each nail with rubbing alcohol. Polish bonds to a clean, dry plate and lifts off an oily one.
- Cap the free edge: run every coat — base, color, top — lightly over the tip. This seals the most chip-prone spot.
- Two thin top coats: one thick coat shrinks as it dries and pulls art with it. Two thin coats, 2 minutes apart, lock everything down — brand guides like Manucurist’s Halloween nail tutorial recommend the same for sealing sticker art.
- Hands off for an hour: avoid hot water and digging through your bag right after painting. For autumn shades that carry into November, browse our fall gel nail designs.
FAQs
What are the easiest Halloween nail designs for beginners?
The easiest Halloween nail designs for beginners are solid-color skittles, dotting-tool ghosts, candy corn tips, and sticker art — every one of them appears in the easy Halloween nails gallery above. They need no drawing skill, just dots, straight lines, or pre-made decals. Start with design #1 or #4 if you have never done nail art before.
What tools do I need to make easy Halloween nails?
You need a 5-piece double-ended dotting tool set, a thin striping brush, 1mm striping tape, Halloween water decals or stickers, slanted tweezers, a fast-dry top coat, and a cleanup brush with acetone. The whole kit costs under $15 and handles every design in this guide. A toothpick works in place of a dotting tool in a pinch.
Can I do Halloween nail art without special brushes?
Yes. A toothpick makes perfect dots for ghost eyes, pumpkin centers, and spider bodies, and the edge of a regular polish brush can draw short straight lines. Stickers and water decals need no tools at all beyond tweezers. Specialty brushes only matter once you want fine spider legs and web lines.
How do I make Halloween nails last through the party?
Start with clean, dry nails wiped with rubbing alcohol, apply a base coat, cap the free edge with every layer, and finish with two thin top coats instead of one thick one. Avoid hot water for the first hour. Done right, a DIY Halloween manicure holds up for 5–7 days — well past October 31st.
Can I do easy Halloween nails on short nails?
Absolutely — short nails suit simple designs best. Stick to one motif per nail: a single ghost, one spider, or a few dots. Skittle manis, sticker art, and dotted eyeballs all look intentional on short nails. Skip detailed multi-element scenes, which need longer nails to avoid looking crowded. More minimalist ideas live in our nail aesthetic ideas roundup.
That is the full lineup — 18 designs, three time budgets, one cheap toolkit. These easy Halloween nails prove you do not need salon skills or a steady hand to show up with themed nails on October 31st. Pick your time budget, grab a dotting tool, and paint the set tonight.
Which one are you trying first? Tell us in the comments — and if you loved these easy Halloween nails, keep exploring: