Disney nails are nail art inspired by Disney characters, films, and parks — from classic Mickey silhouettes and Minnie bows to princess motifs, villain sets, and subtle castle accents. The 2026 trend is “classy, not costume-y”: glazed donut Mickey heads, cherry French tips with a hidden Mickey, and pearl finishes that photograph perfectly in front of the castle.
On this page
- How to choose your Disney nail design
- 25 Disney nail designs worth trying in 2026
- 3 easy Disney nail tutorials (step by step)
- Disney nails for short nails
- Disney press-on nails worth buying
- How to make your Disney nails last a full park trip
- Salon vs DIY: what Disney nails cost
- FAQs
How to choose your Disney nail design
Picking the right Disney nails comes down to three things: your favorite character or park memory, your nail length, and how much time you have. Short nails suit simple silhouettes and dot art; long nails carry detailed character portraits. Beginners should start with simple Disney nails like a Mickey dot-head or polka-dot Minnie — both take under 30 minutes and need nothing fancier than a dotting tool.
| Design | Difficulty (1–5) | Time | Best nail length | Perfect for |
|---|---|---|---|---|
| Mickey dot-head silhouette | 1 | 20 min | Any | First-timers, park trips |
| Minnie bow polka dots | 1 | 25 min | Any | Cute everyday wear |
| Hidden Mickey French tip | 2 | 30 min | Short–medium | Subtle Disneybound looks |
| Glazed donut Mickey | 2 | 35 min | Medium–long | 2026 trend followers |
| Princess pastel ombré | 3 | 45 min | Medium–long | Weddings, spring trips |
| Castle silhouette accent | 3 | 40 min | Medium | Castle selfies |
| Maleficent flame nails | 4 | 60 min | Long | Halloween parties |
| Jack Skellington faces | 3 | 45 min | Any | Halloween, Nightmare fans |
| Toy Story cloud nails | 2 | 30 min | Any | Pixar lovers, kids |
| Star Wars galaxy nails | 4 | 60 min | Long | Galaxy’s Edge visits |
25 Disney nail designs worth trying in 2026
Here is the full lineup, grouped by theme. Every design below works as a DIY project or as a reference photo to hand your nail tech — save the one you love before your appointment.
Classic Mickey & Minnie (1–6)
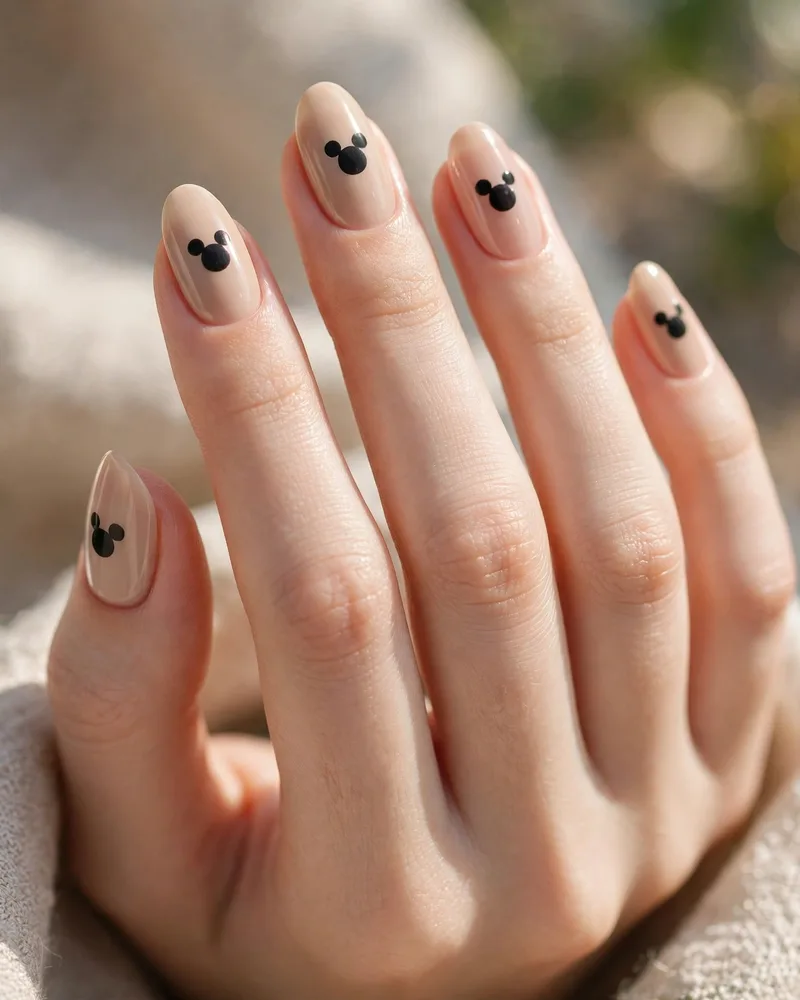
1. Mickey dot-head silhouette
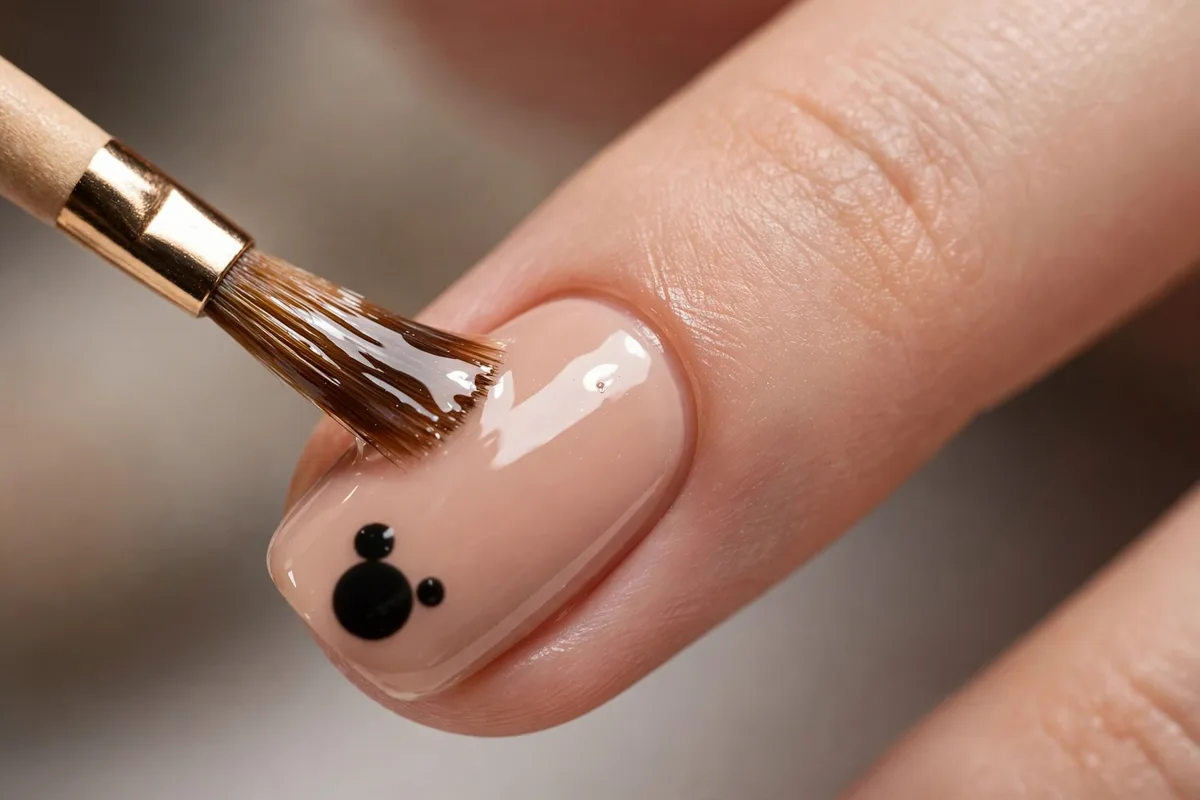
The icon itself, and the easiest Disney design you’ll ever do: one large dot for the head and two small dots for the ears, placed with a dotting tool. Classic black on a nude base reads chic and minimal, while white dots on red give a retro pin-up pop. It takes about twenty minutes and works on any nail length or shape.
2. Minnie bow polka dots
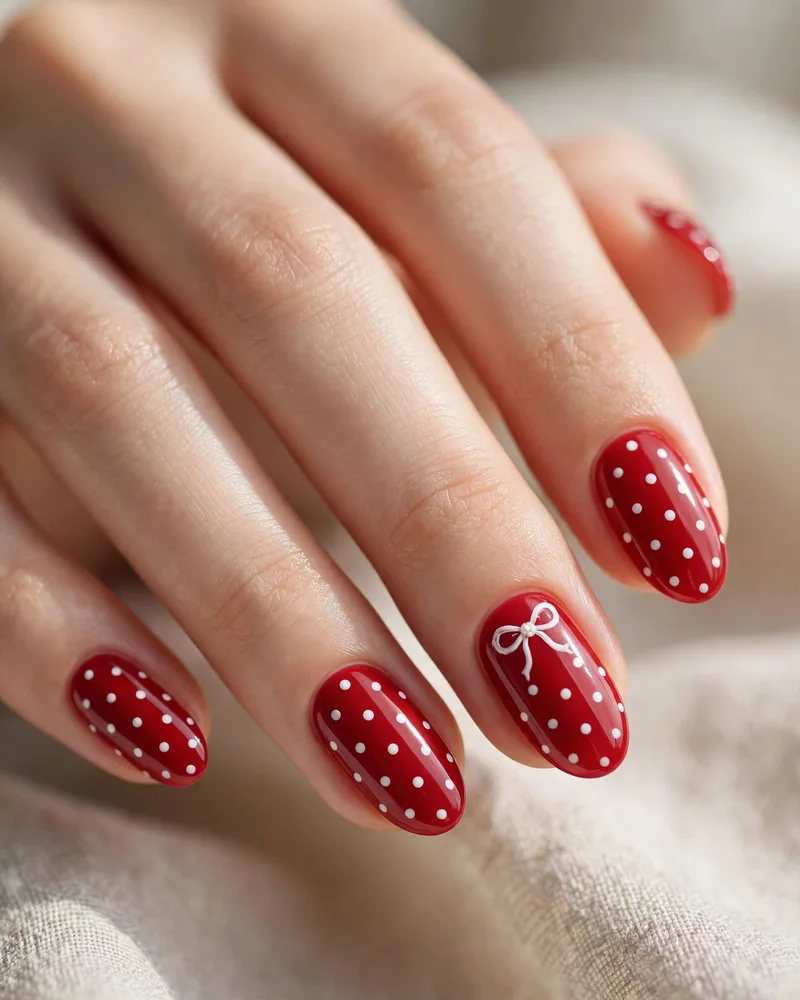
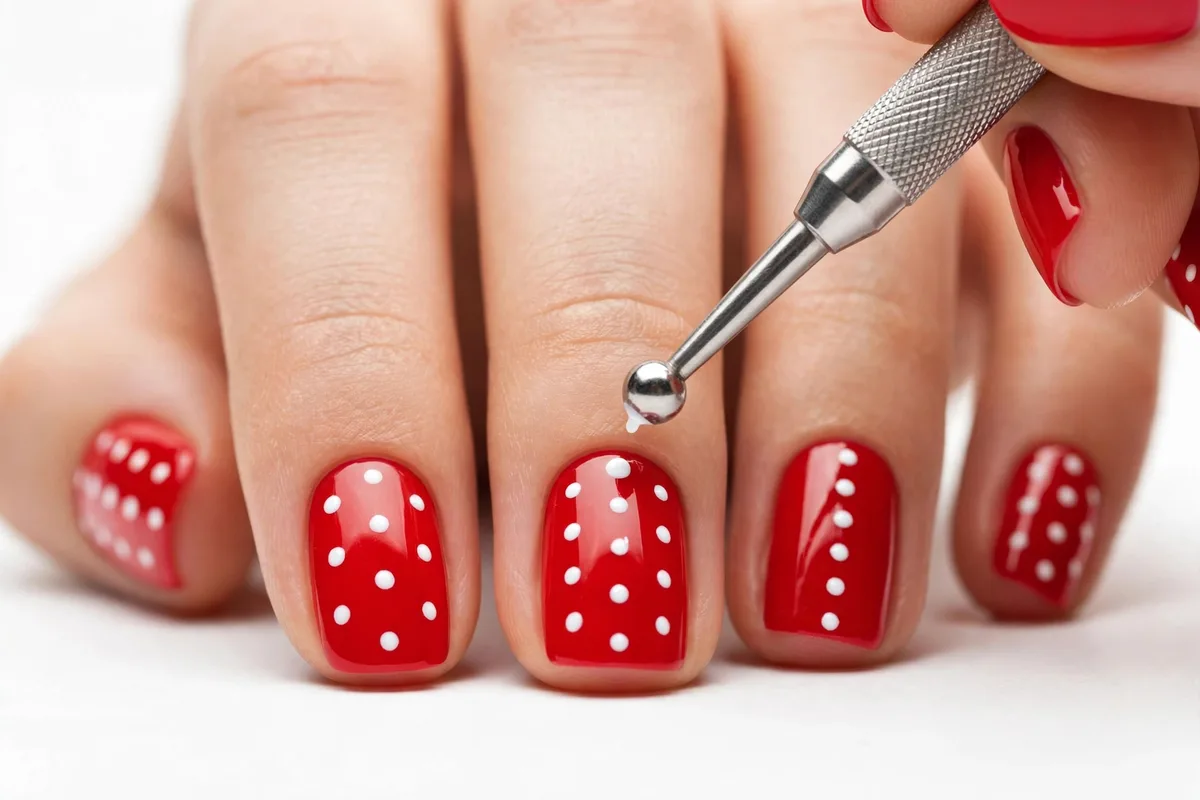
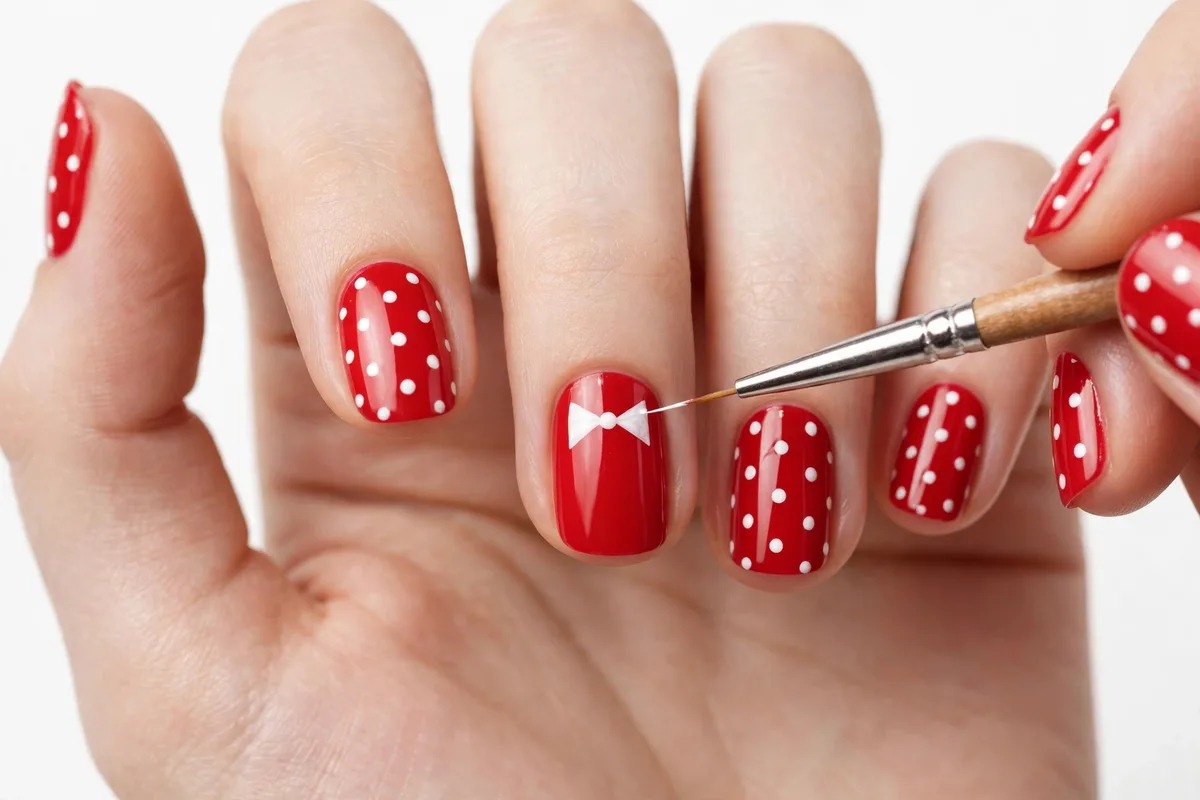
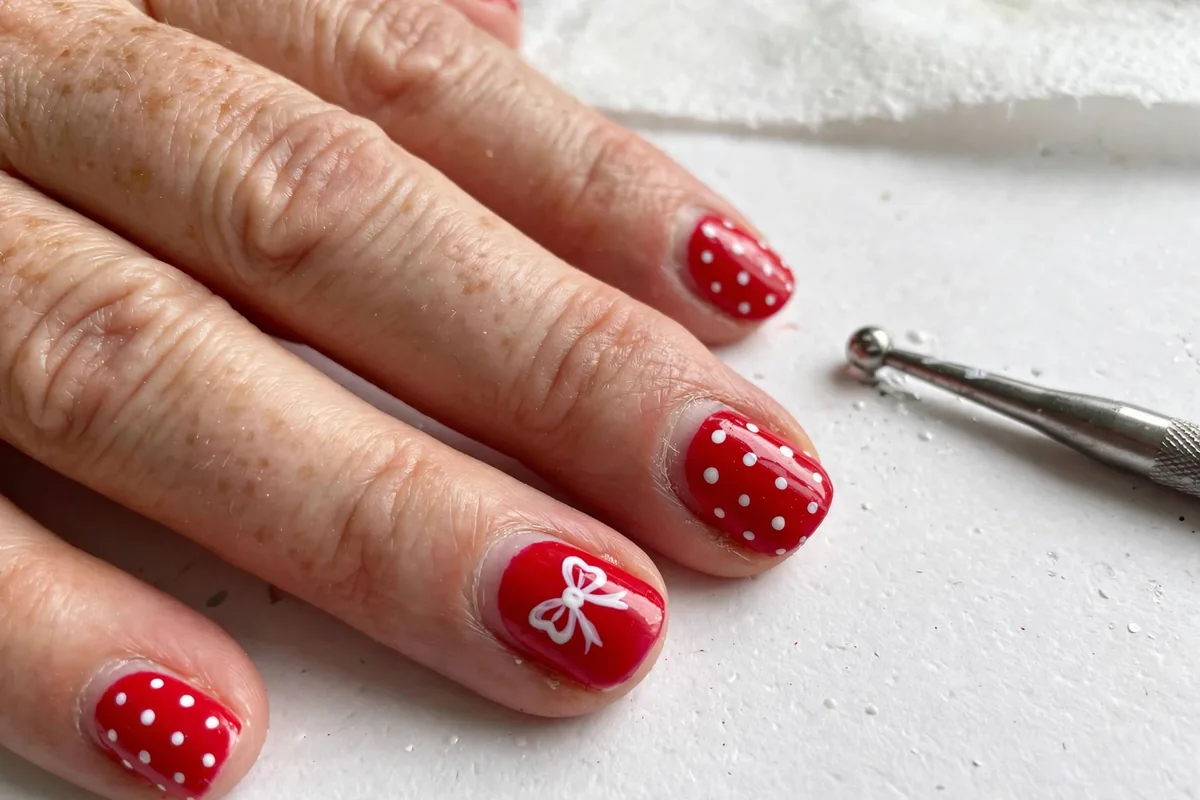
A glossy red base scattered with evenly spaced white polka dots, finished with one tiny hand-drawn bow on the ring finger. The bow is the only fiddly part — a thin detail brush and a steady hand do it, or a small bow decal works just as well. Cute enough for everyday wear, yet polished enough for a full park day.
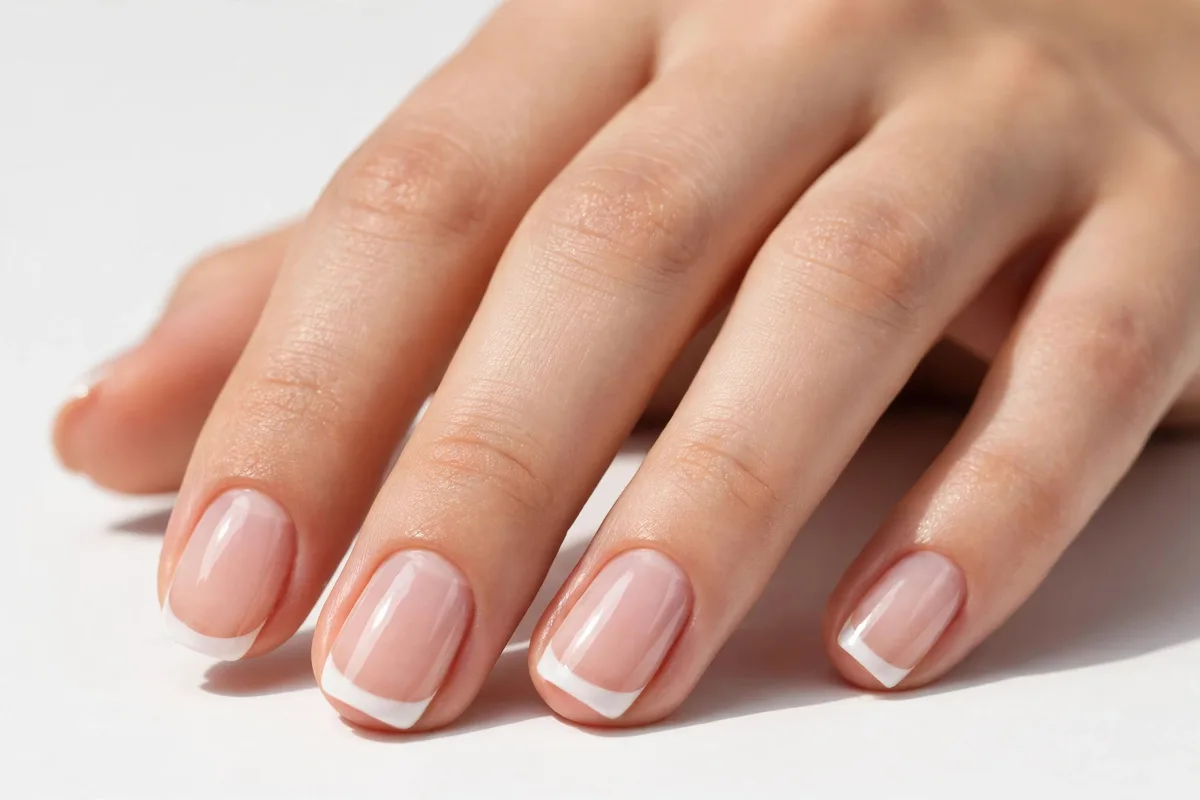
3. Hidden Mickey French tip
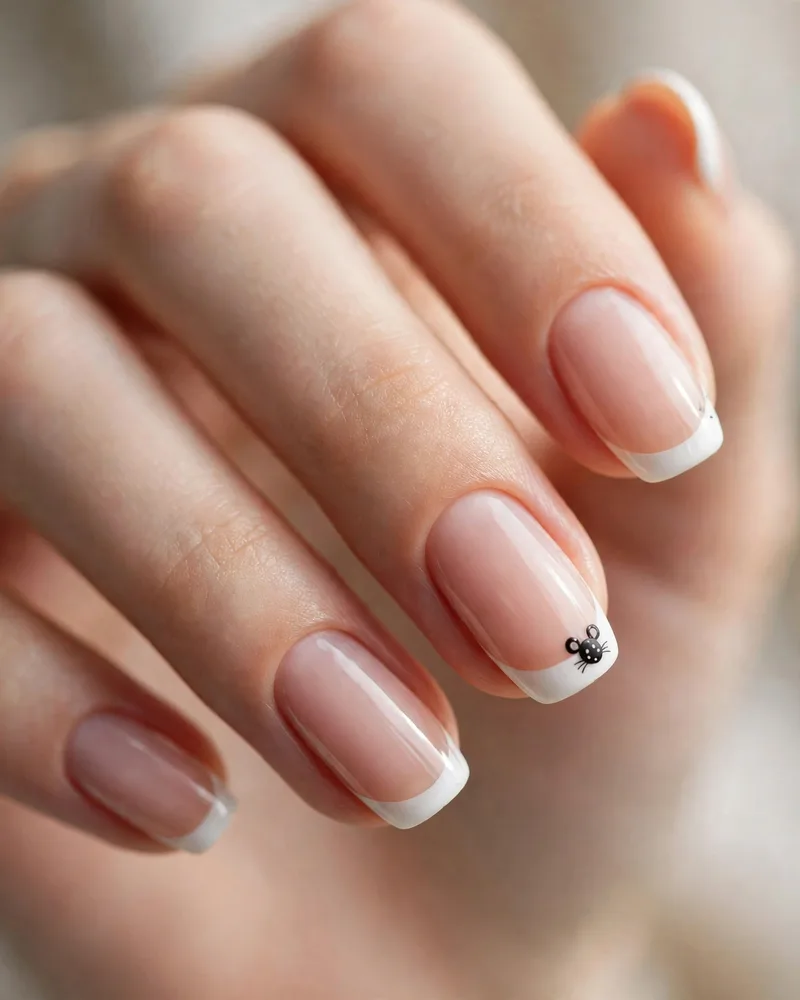
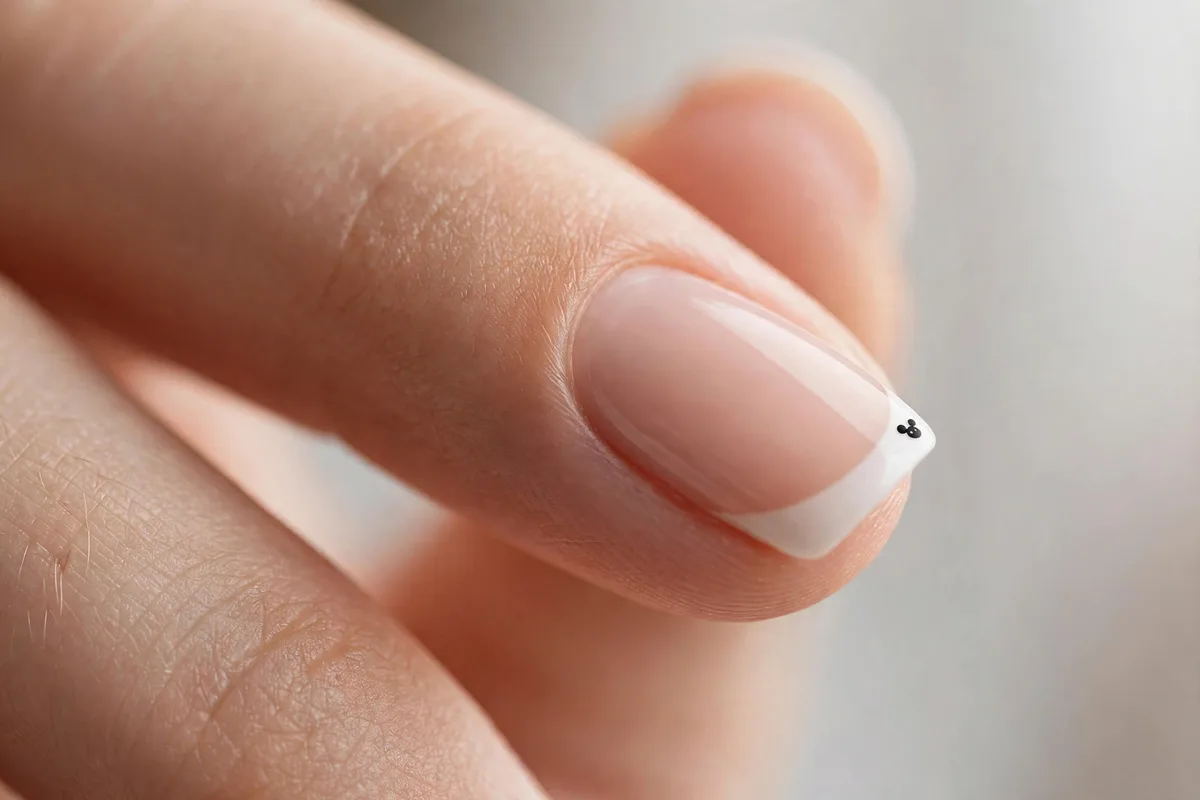
A classic French manicure — nude base, crisp white tips — with a tiny Mickey head tucked into the corner of one tip. Keep the silhouette under three millimeters so it reads as a secret detail rather than a logo. Subtle enough for the office, and a favorite among Disneybounders who want the nod without the costume.
4. Glazed donut Mickey
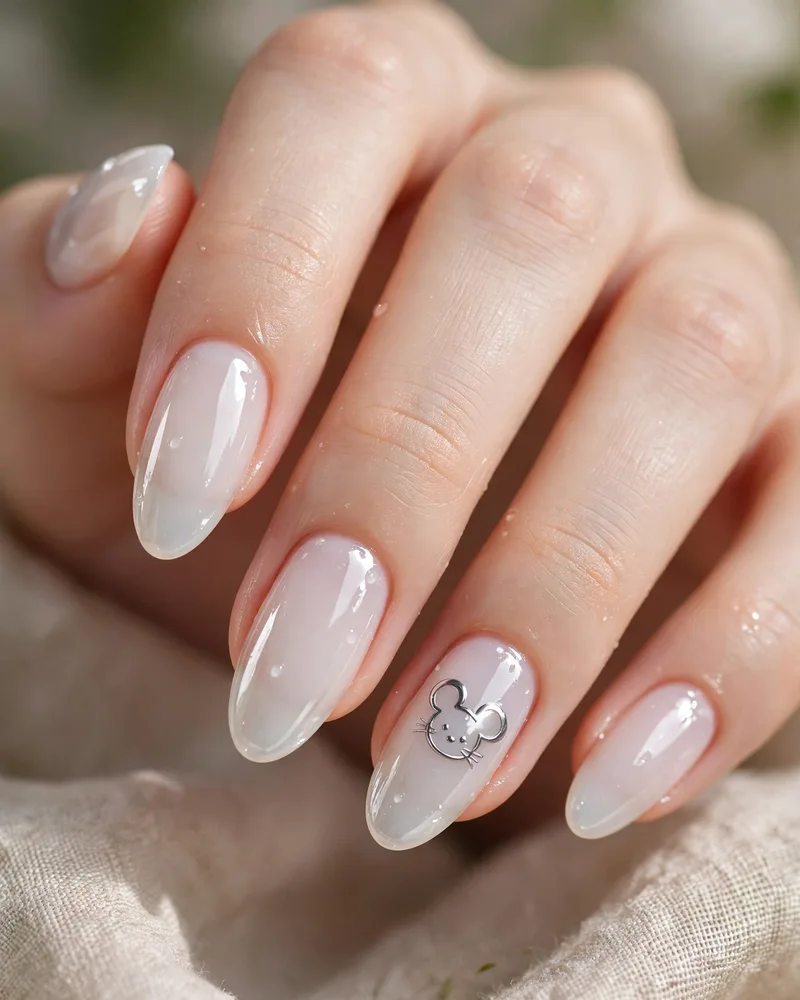
Hailey Bieber’s glazed-donut finish in sheer white, sealed with a chrome powder rub and topped with a delicate chrome Mickey silhouette. The pearlescent shine photographs beautifully in daylight, which is why it’s the most-pinned Disney nail of 2026. Best done in gel or with a chrome-effect top coat for that mirror glow.
5. Steamboat Willie
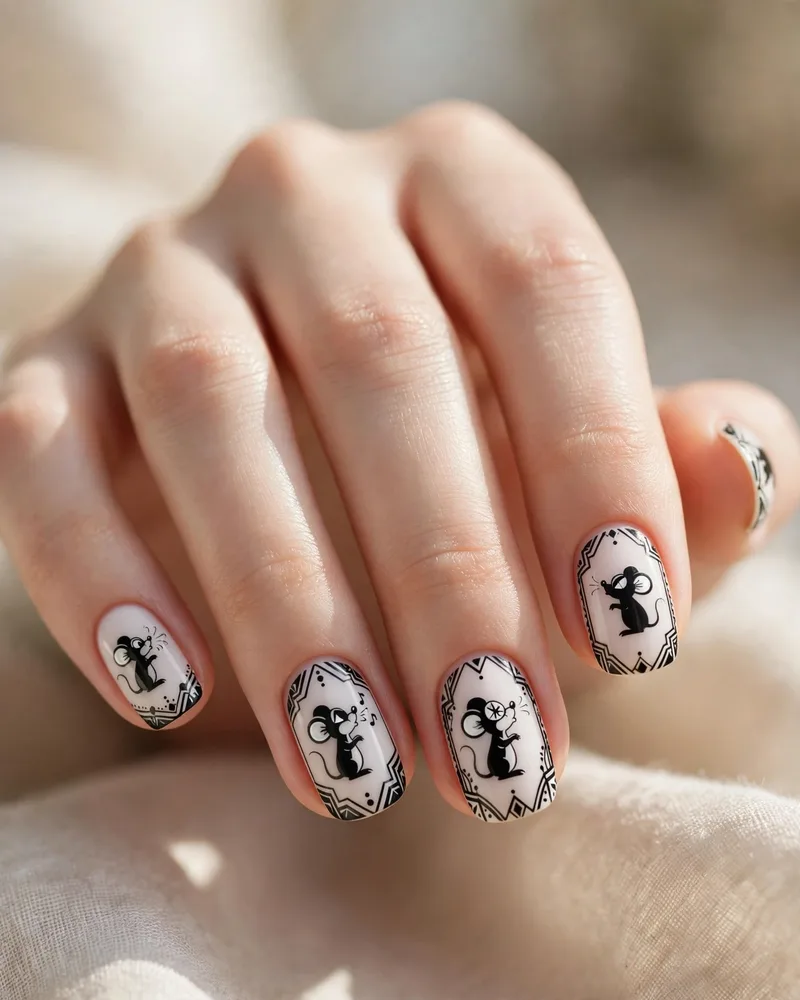
A black-and-white tribute to 1928: vintage Mickey’s face sketched in fine line art over a matte white base. The monochrome palette keeps it artsy rather than cartoonish, and it pairs with everything in your wardrobe. Ask your tech for hand-painted line work, or use water-slide decals for a DIY version.
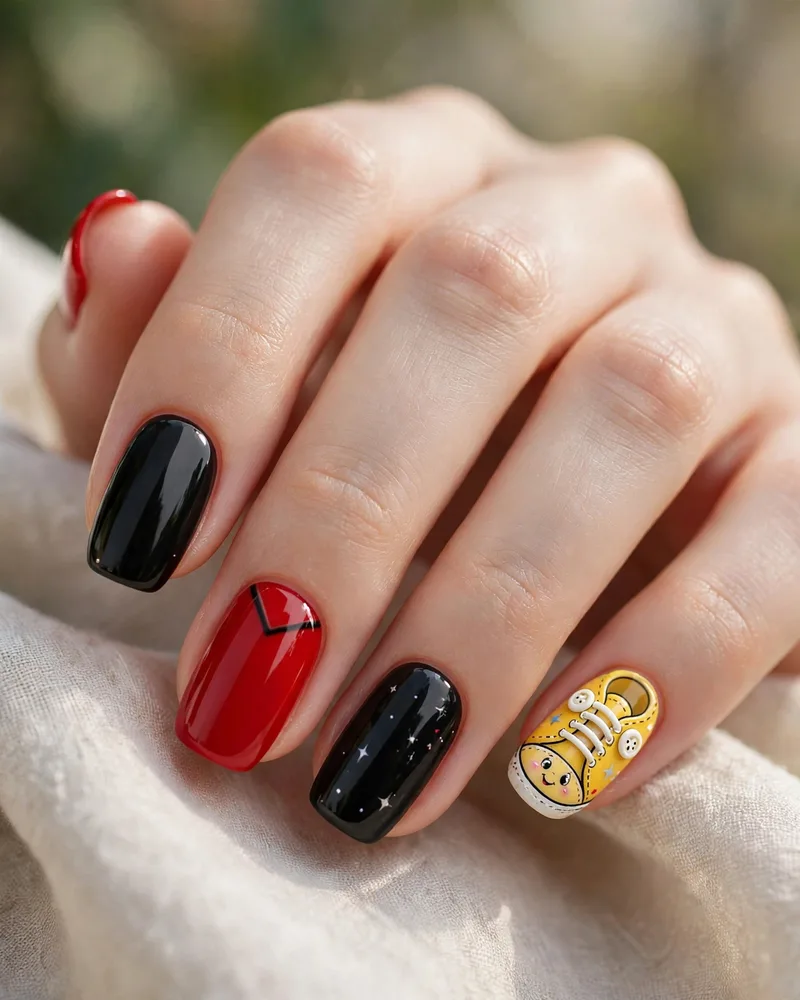
6. Mickey’s yellow shoe
One accent nail painted like Mickey’s oversized yellow shoe — complete with the little oval details — set against a bold red-and-black manicure. It’s a conversation starter that only true fans clock immediately. Keep the other nails simple so the shoe stays the star of the set.
Princesses (7–12)
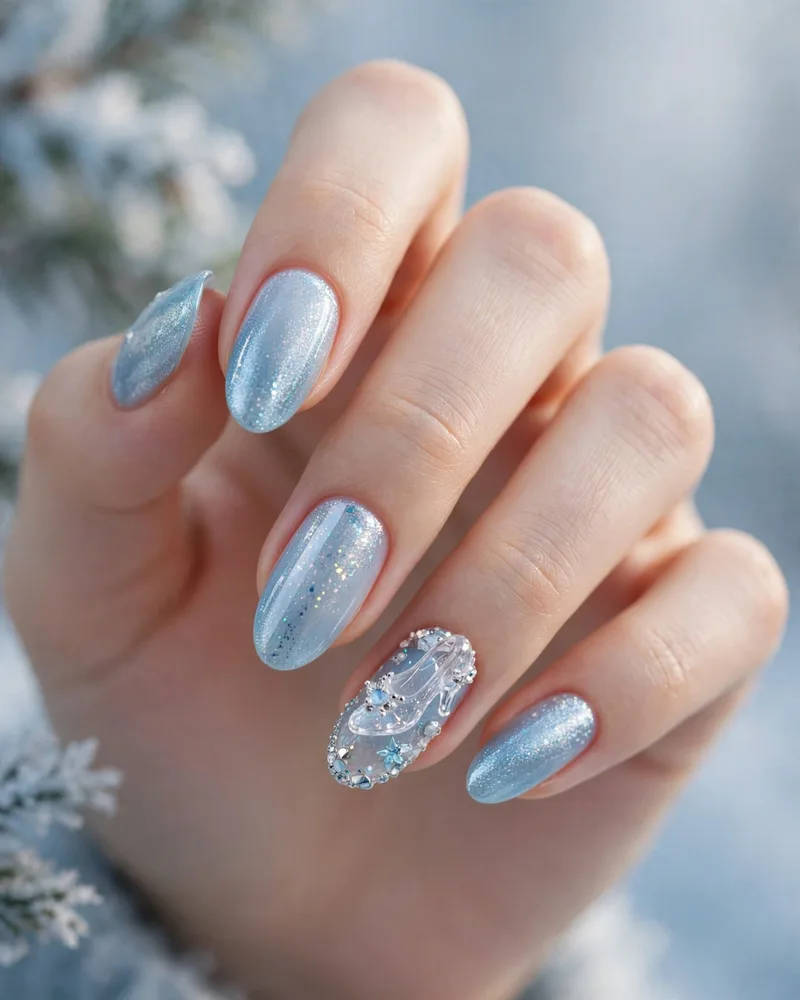
7. Cinderella glass-slipper blue
An icy, shimmery blue inspired by the glass slipper, with one accent nail fully coated in fine silver glitter as the ‘slipper’ nail. The cool tones flatter fair to medium skin beautifully. A lovely pick for weddings, winter trips, or anyone who wants princess without pink.
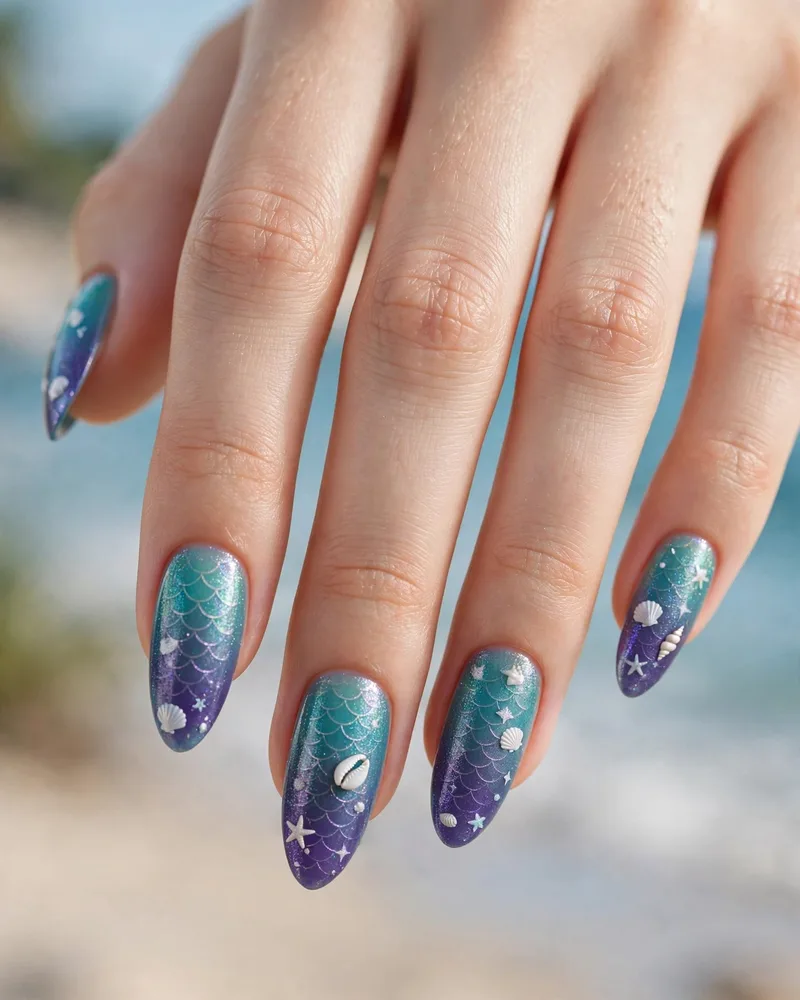
8. Ariel sea ombré
A teal-to-purple ombré gradient that moves like water, finished with tiny shell and starfish decals near the cuticle. Sponge the gradient for the smoothest blend, then seal with a glossy top coat so the colors melt together. Made for summer park days and beach vacations.
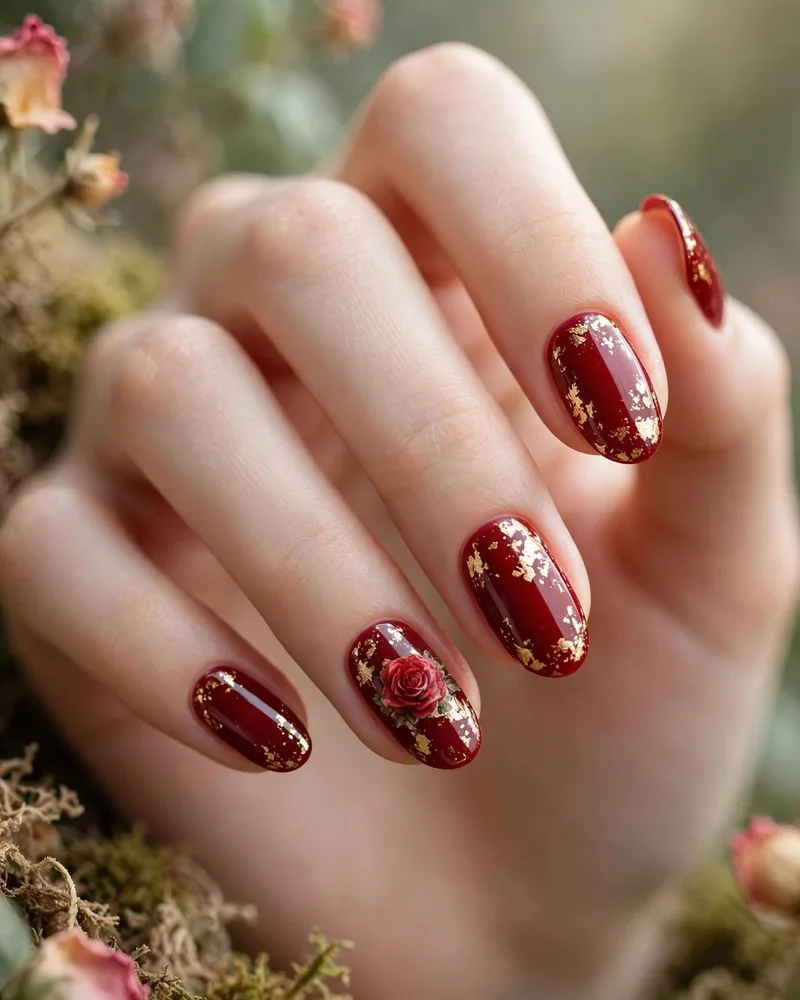
9. Belle enchanted rose
Deep, romantic red loaded with gold foil flakes, plus one accent nail carrying a hand-painted or decal rose under a glass-dome shine. The gold catches candlelight beautifully, so this set was made for date nights. Works best on almond or coffin shapes where the foil has room to shine.
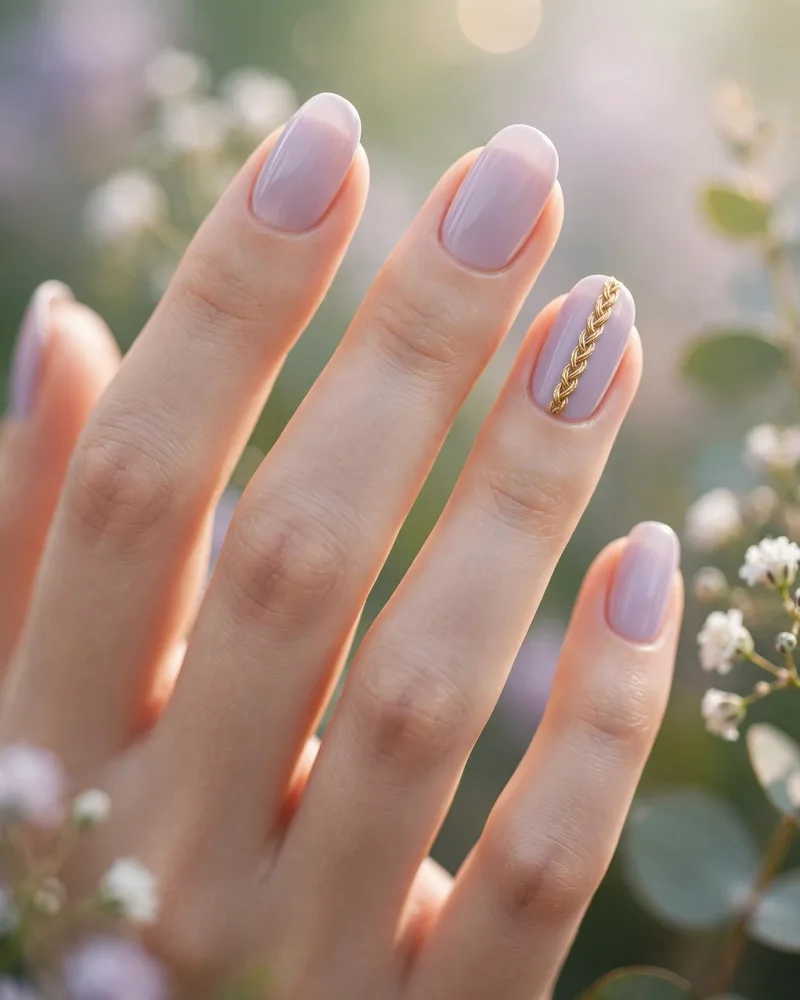
10. Rapunzel braid accent
A soft lavender base with a thin gold braid line running down one accent nail, dotted with tiny flower decals like the blooms woven through Rapunzel’s hair. The vertical line visually lengthens the nail, so it’s flattering on shorter nails too. Sweet, springy, and quietly detailed.
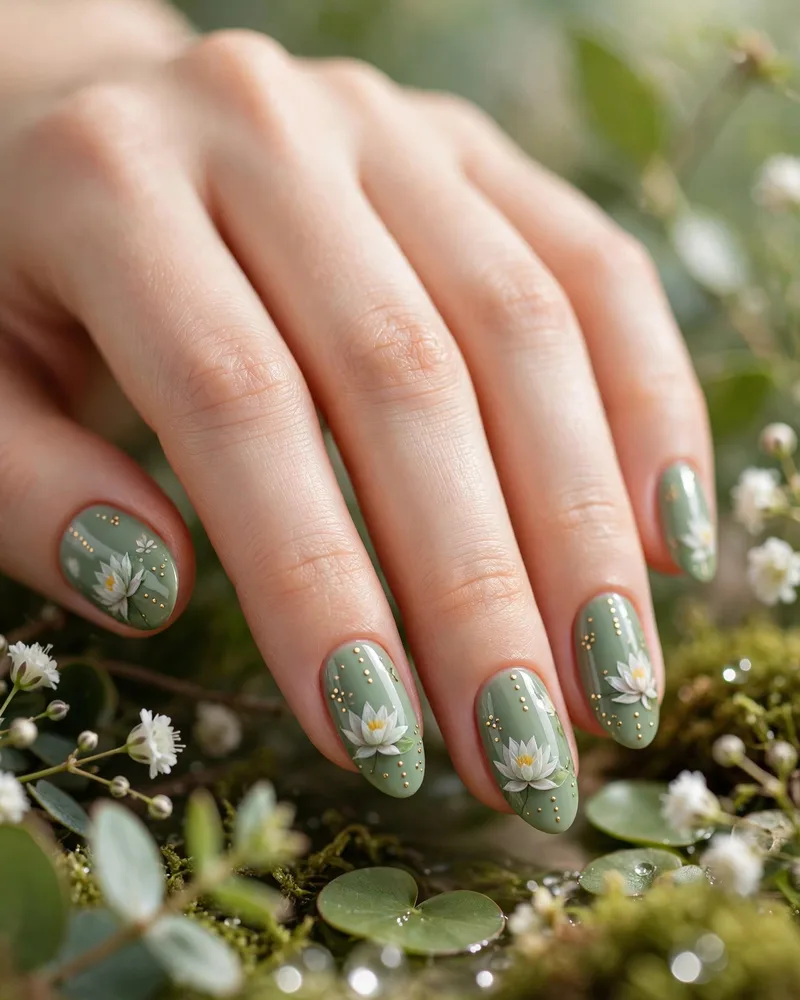
11. Tiana lily-pad green
A fresh sage green with delicate white lily decals and the occasional gold dot for pollen. It’s an unexpected, garden-party color that stands out from the usual pinks and reds. Perfect for spring trips, and the green flatters warm skin tones especially well.
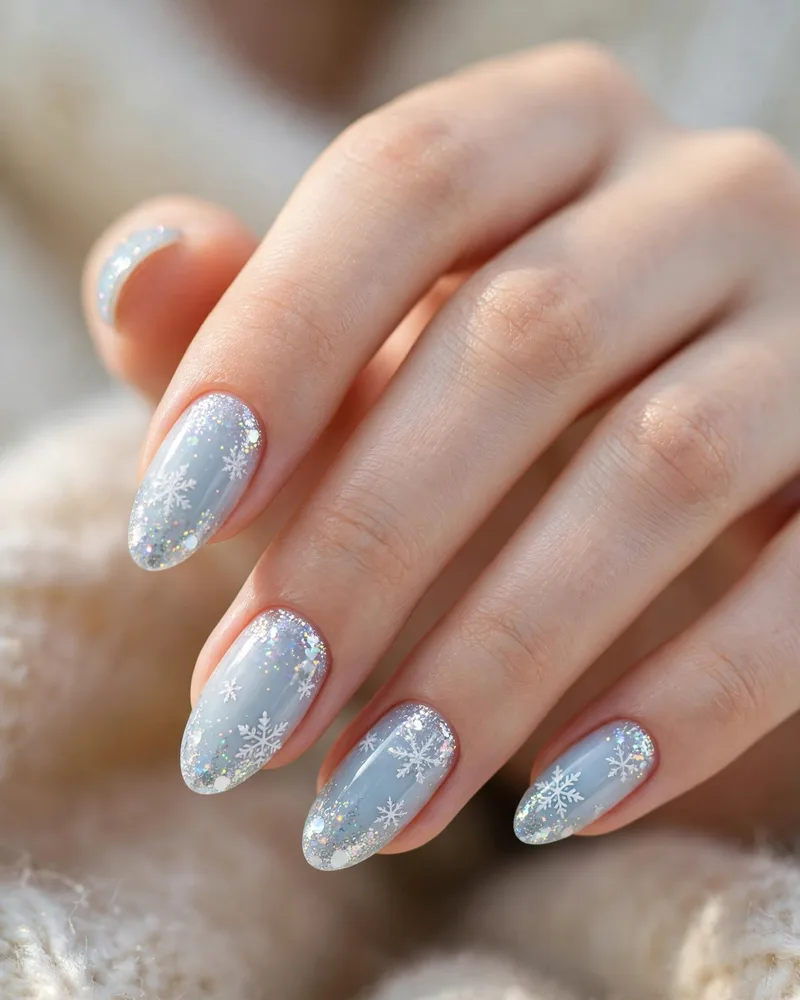
12. Elsa ice queen
Pale, frosty blue layered with holographic glitter and stamped snowflakes in white. The holo particles shift color as your hands move, giving real ice-crystal dimension. A winter-trip essential — and the glitter base hides regrowth, so it wears well for a full week.
Villains & Halloween (13–16)
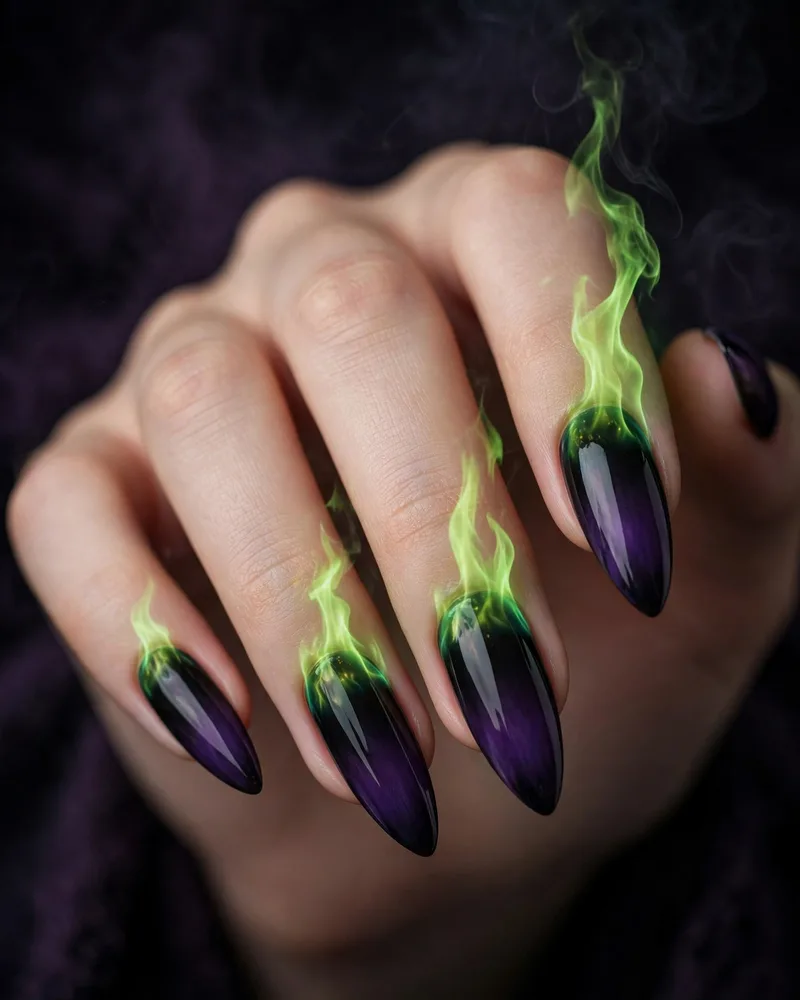
13. Maleficent flames
A black-to-purple gradient with wicked green flame tips licking up from the free edge. The high-contrast design demands long nails — stiletto or coffin — to give the flames room to spread. The ultimate Halloween set, and dramatic enough for a villains-themed party any time of year.
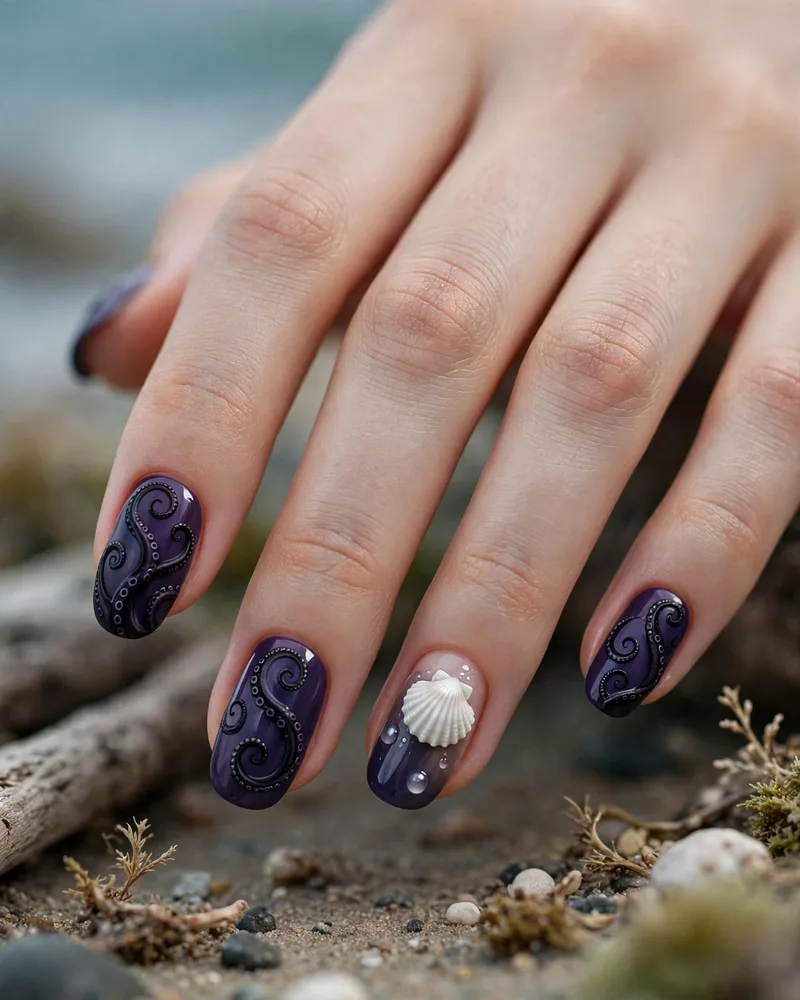
14. Ursula tentacle swirls
Deep, inky purple swirled with black tentacle art that curls across each nail, plus one shell accent for the sea-witch touch. The swirls are easiest with a thin detail brush and a steady hand, or press-on decals if freehand isn’t your thing. Dark, moody, and made for October.
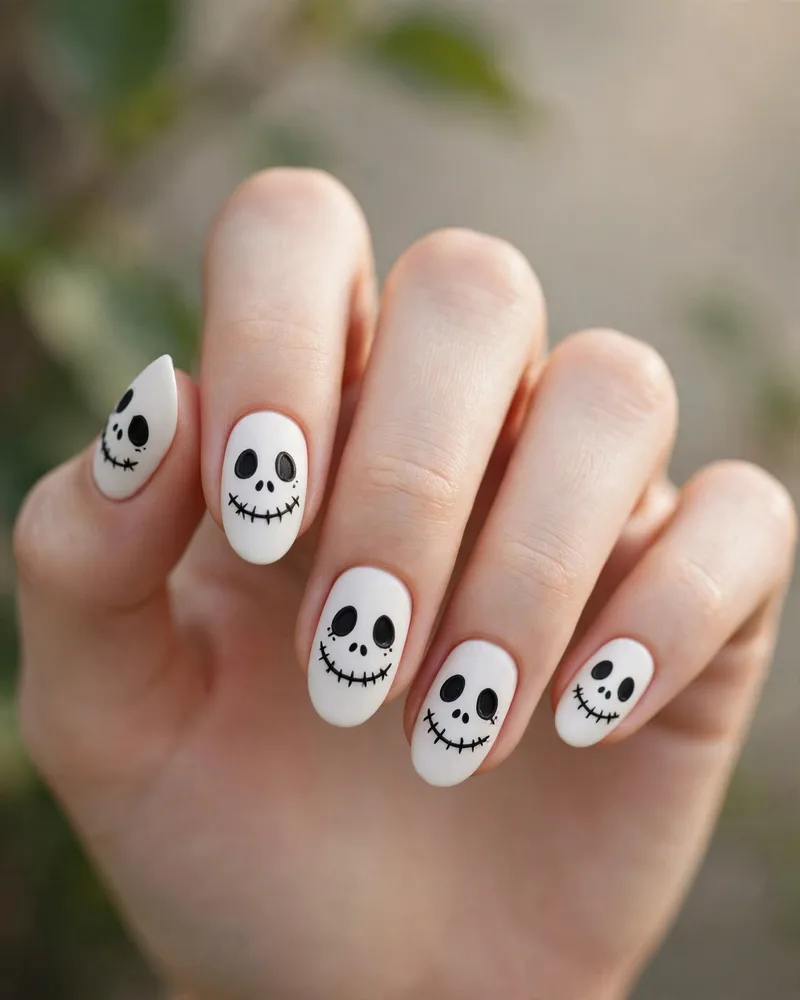
15. Jack Skellington faces
A crisp white base with Jack’s hollow black eyes and stitched mouth painted on each nail — instantly recognizable from across the room. The graphic black-and-white contrast works on any nail length, including short nails. A Halloween staple that never looks dated.
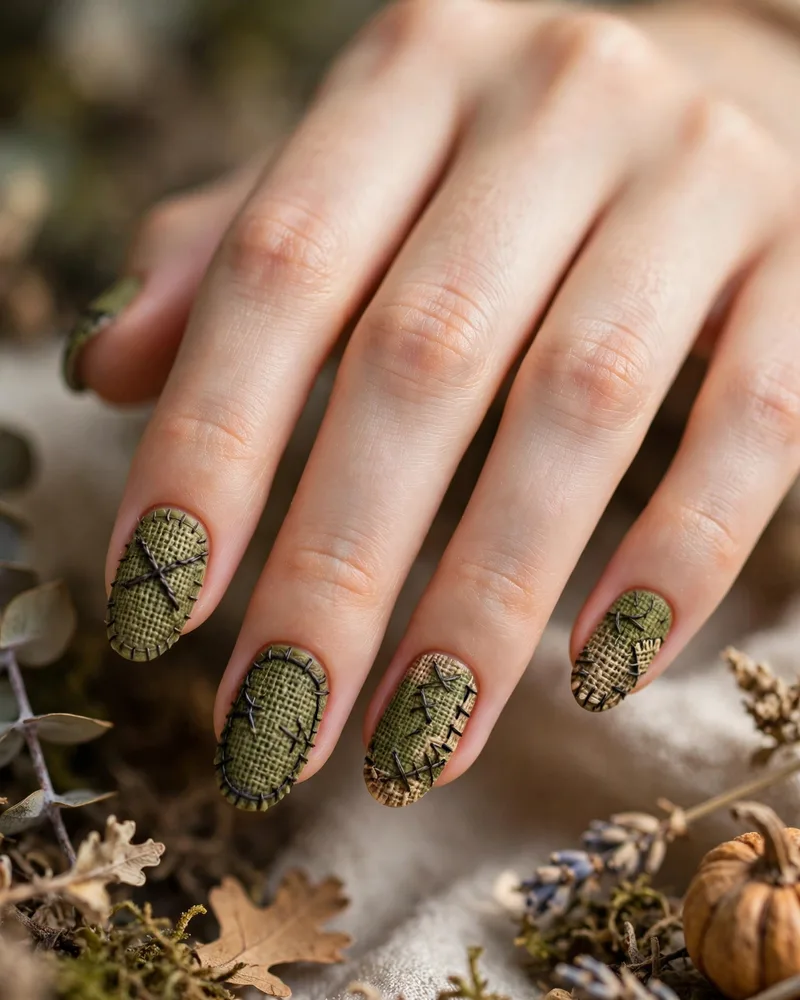
16. Oogie Boogie burlap
An olive-green textured base that mimics burlap, detailed with black stitching lines like Oogie’s sewn-up seams. A matte top coat sells the fabric effect far better than gloss. It’s the most underrated Nightmare Before Christmas design — spooky, textural, and totally unique.
Pixar & Star Wars (17–20)
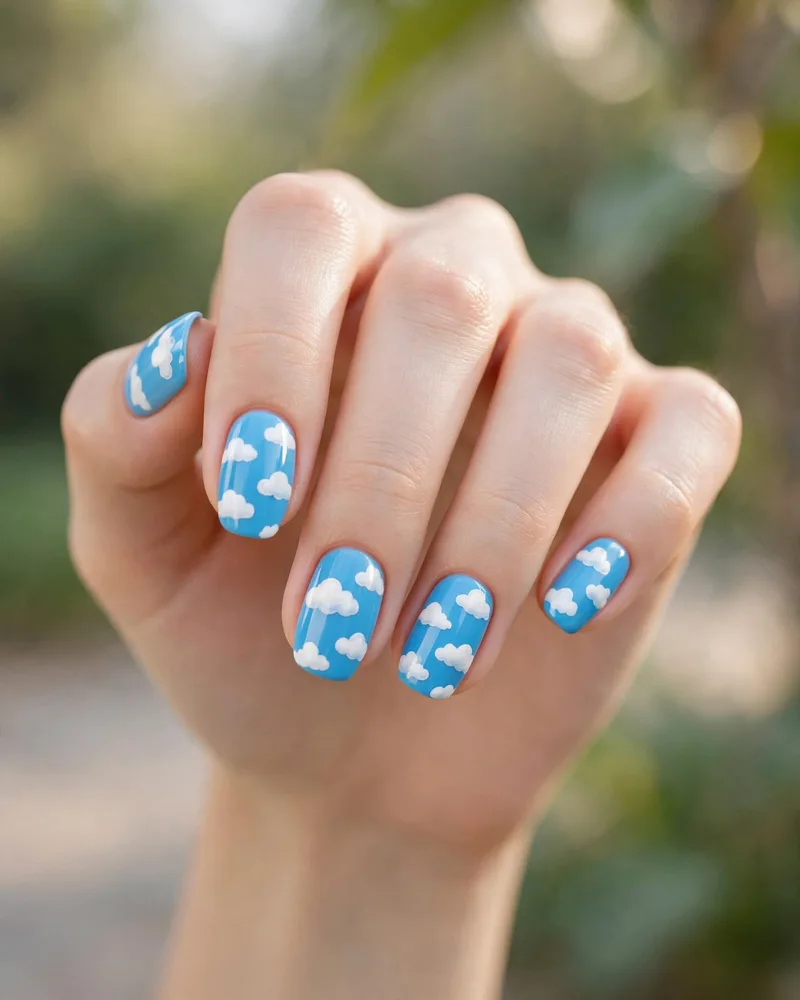
17. Toy Story clouds
The iconic blue-sky-with-white-clouds wallpaper from Andy’s room, recreated nail by nail. A makeup sponge dabs the clouds on effortlessly — no artistic skill required — over a bright sky-blue base. Playful, cheerful, and a hit with kids and Pixar grown-ups alike.
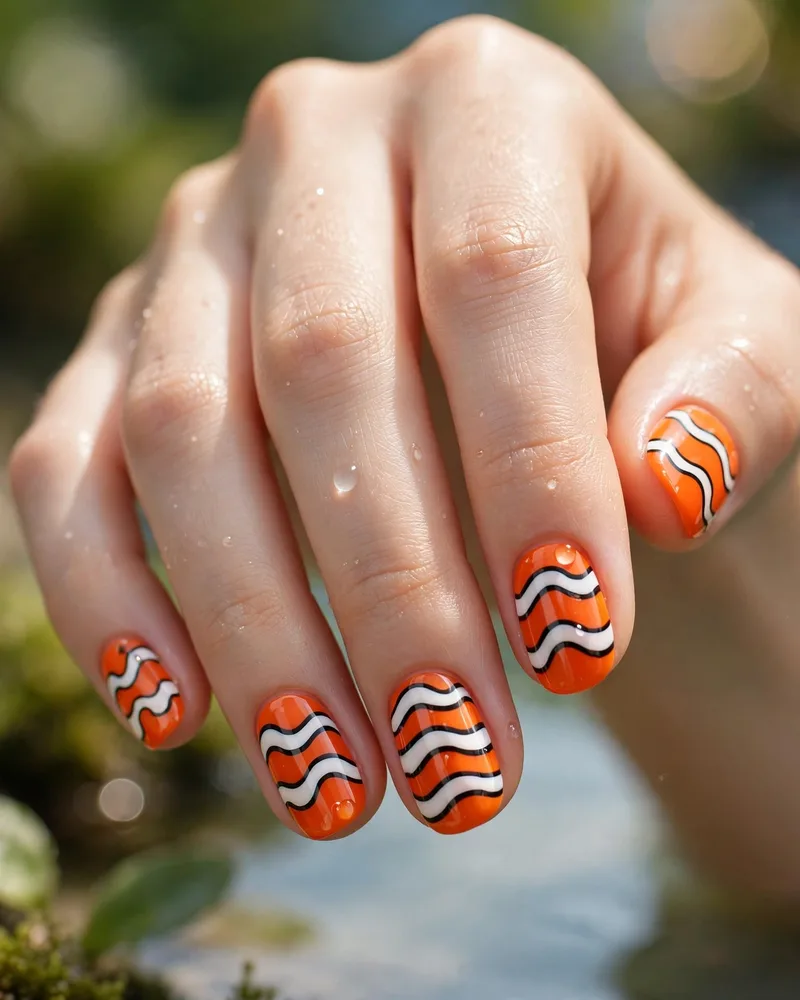
18. Nemo stripes
Bright clownfish orange banded with wavy white and black stripes, just like Nemo himself. The wavy lines are forgiving — slight wobbles only make them look more organic. A fun, high-energy set for summer and for anyone who loves a bold, graphic manicure.
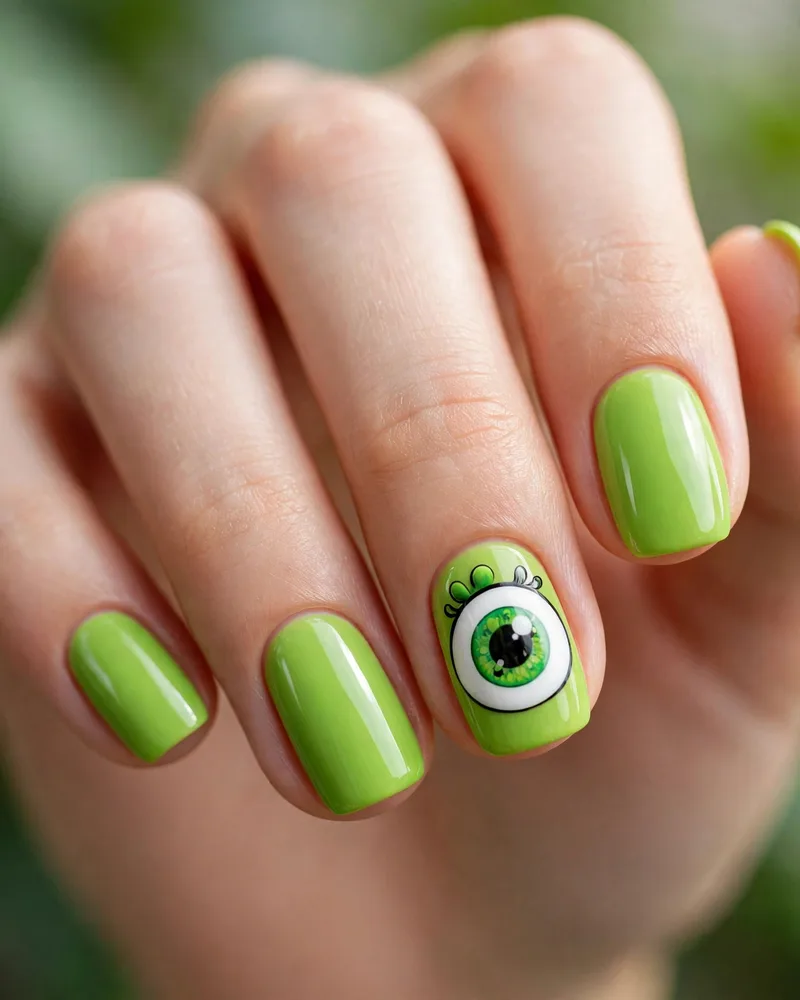
19. Mike Wazowski eye
Lime green nails with one giant, perfectly round Mike Wazowski eye decal on the ring finger. The single eye against the neon green is pure Monsters, Inc. — funny, bright, and impossible to miss. Keep the green glossy; the shine makes the eye pop even more.
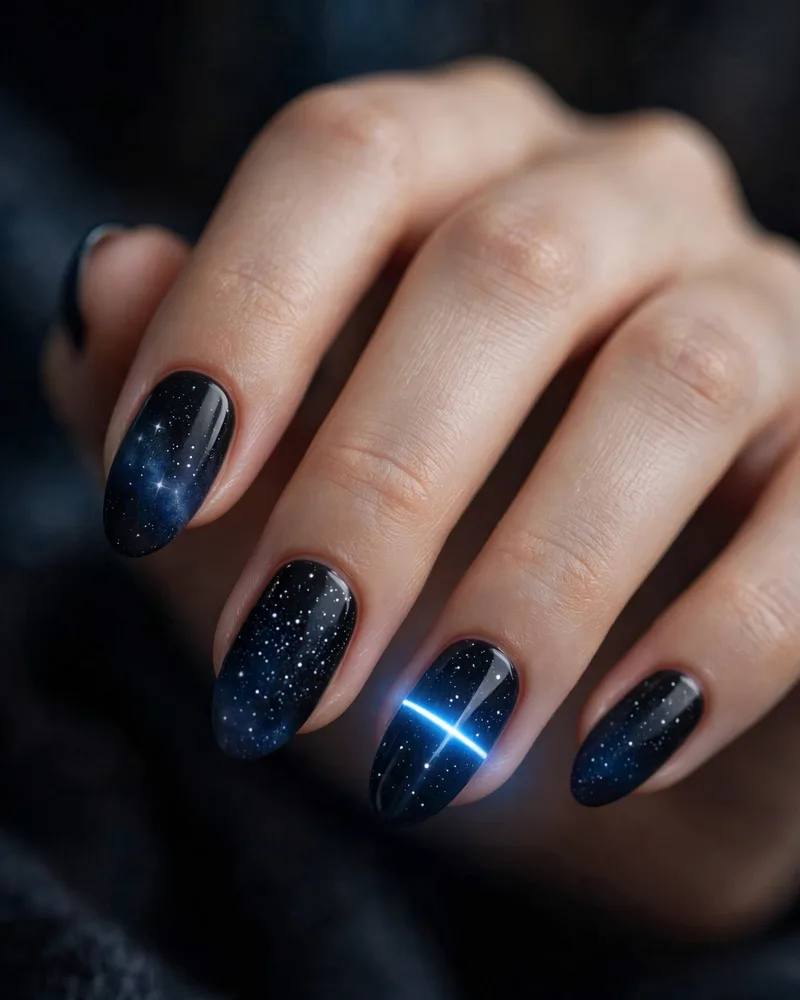
20. Galaxy’s Edge galaxy
A black-to-navy sponge gradient scattered with tiny star dots, finished with one neon lightsaber line in your chosen kyber color. The deep base makes the stars glow like a real night sky. A must for Galaxy’s Edge visits — pick blue or red for the saber to match your allegiance.
Park-inspired (21–25)
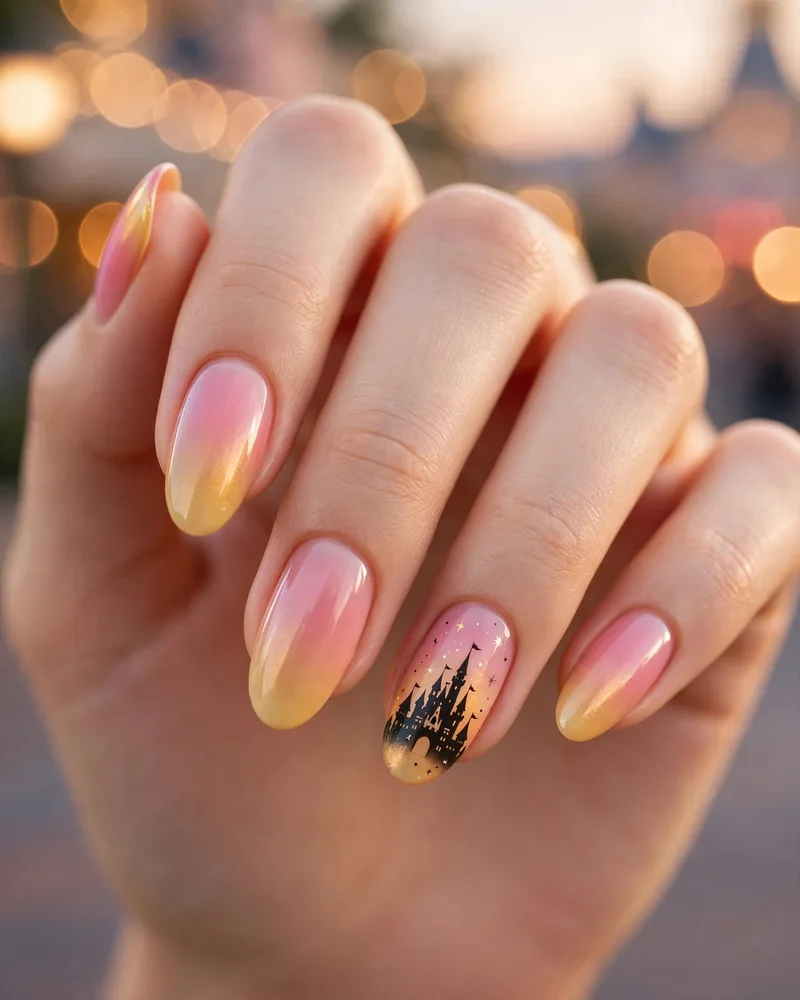
21. Castle silhouette
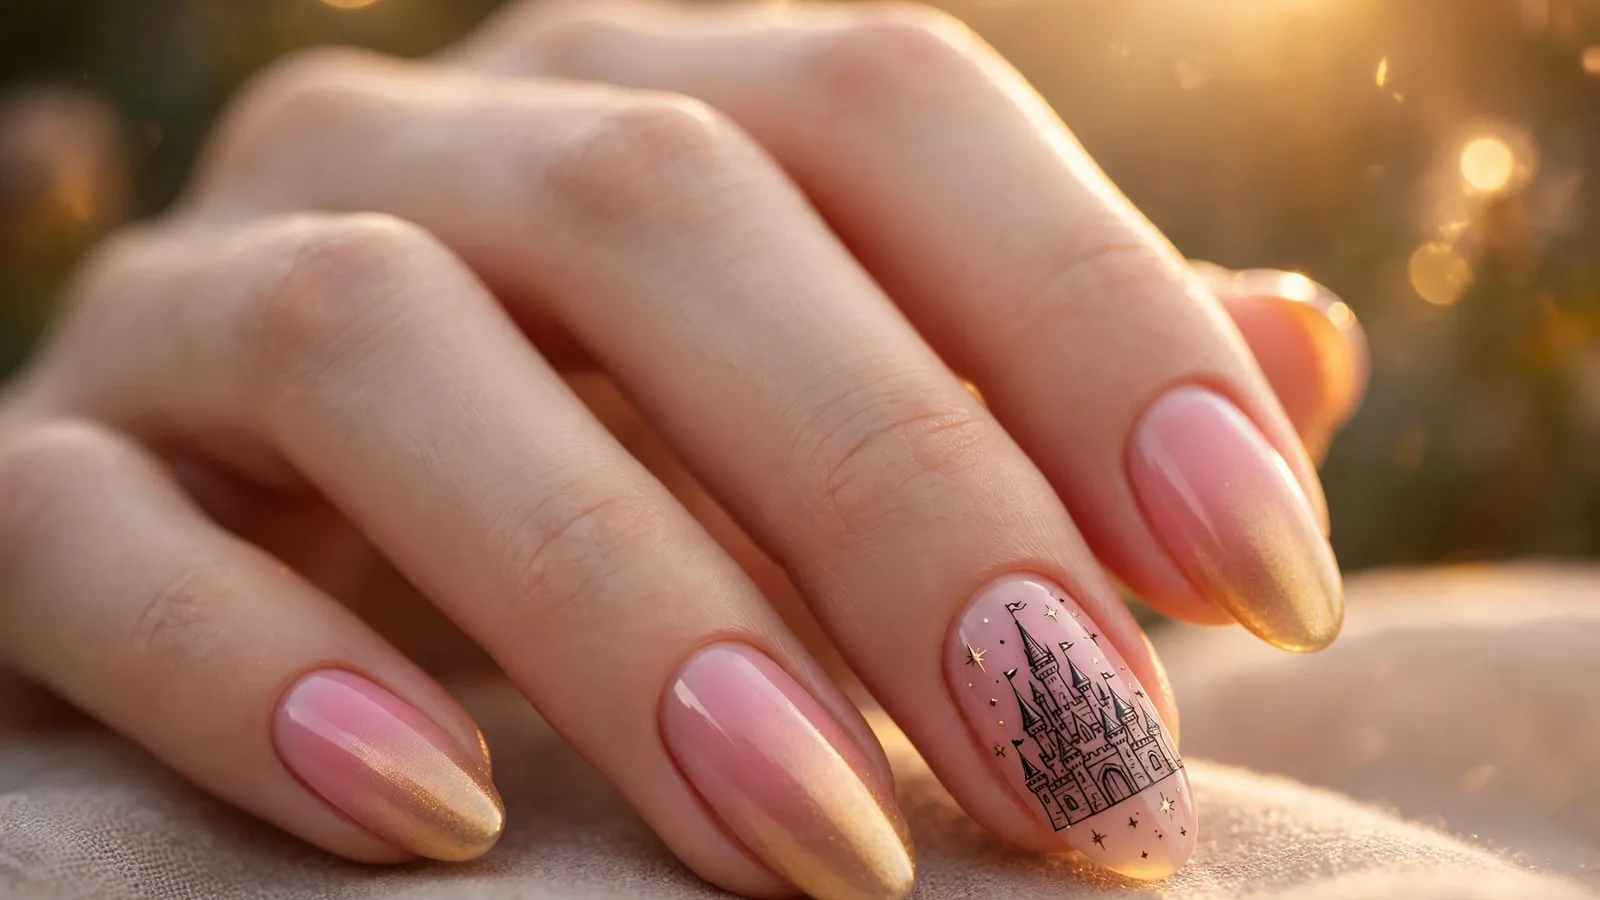
A pink-and-gold sunset gradient with a crisp black castle silhouette hand-painted on the ring finger. The silhouette needs a steady hand or a fine decal — it’s the detail that makes the whole set. Made for castle selfies; this is the design people save for their park trip.
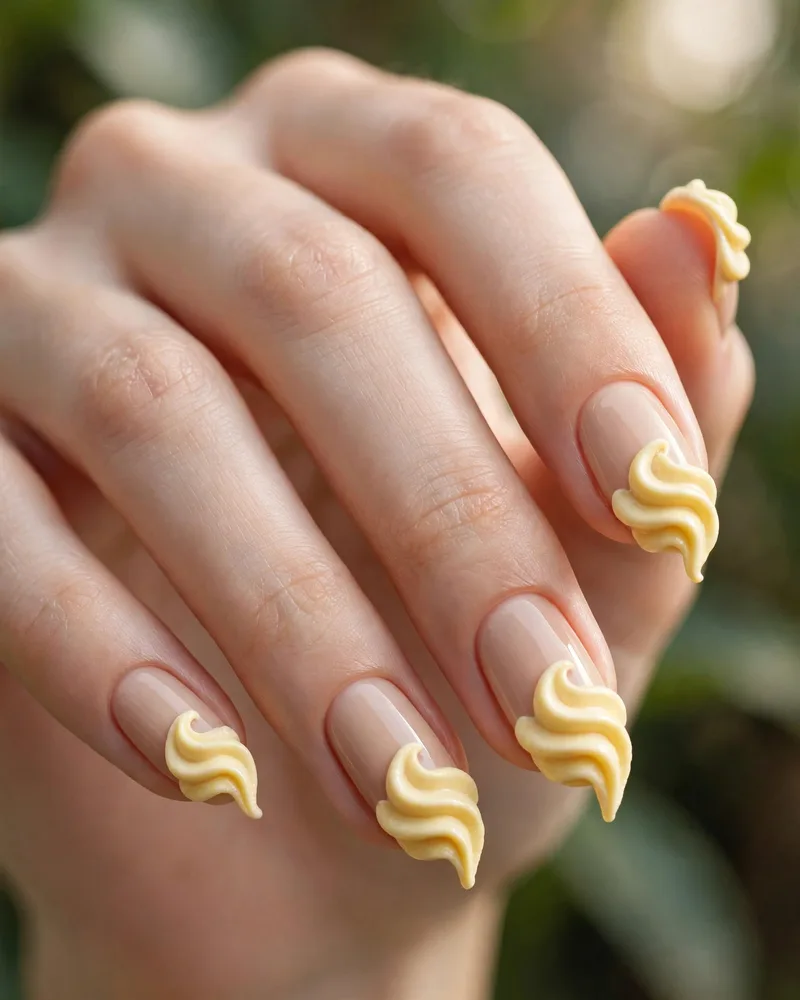
22. Dole Whip pastel
Soft pineapple-yellow swirl tips on a nude base, echoing the famous Dole Whip treat. The pastel yellow is surprisingly wearable — cheerful without screaming for attention. A sweet, subtle pick for summer park days and for matching your snack to your manicure.
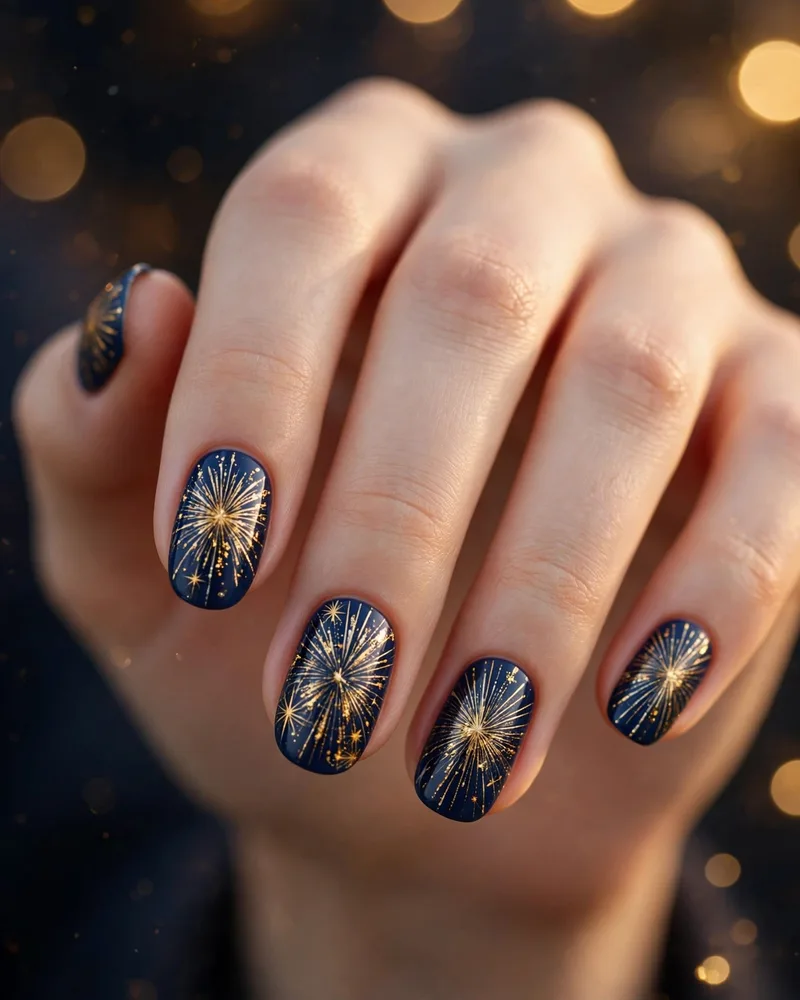
23. Main Street fireworks
A deep navy base bursting with hand-painted gold firework explosions on every nail. Thin detail brushes make the fine burst lines, while a dotting tool adds the tiny spark dots. Festive, glamorous, and perfect for evening events or New Year’s Eve.
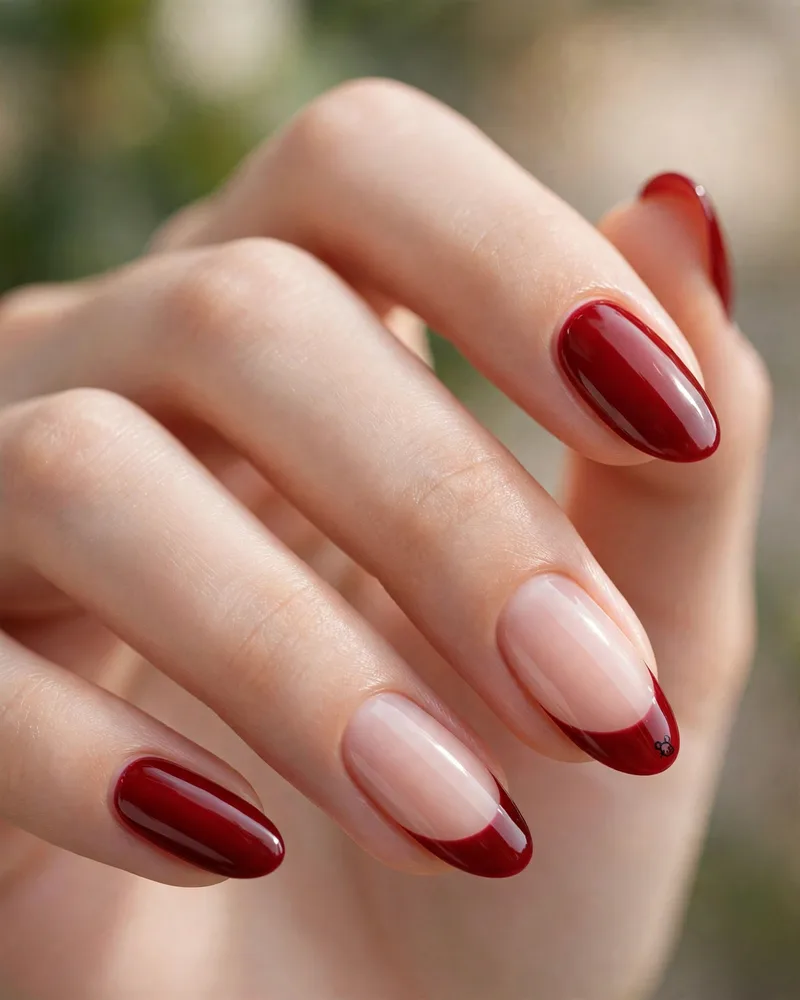
24. Cherry French tips
Deep cherry-red French tips with a single tiny hidden Mickey tucked into one corner. The dark red reads sophisticated and grown-up, while the hidden Mickey keeps it playfully Disney. A great office-to-park design that works in any season.
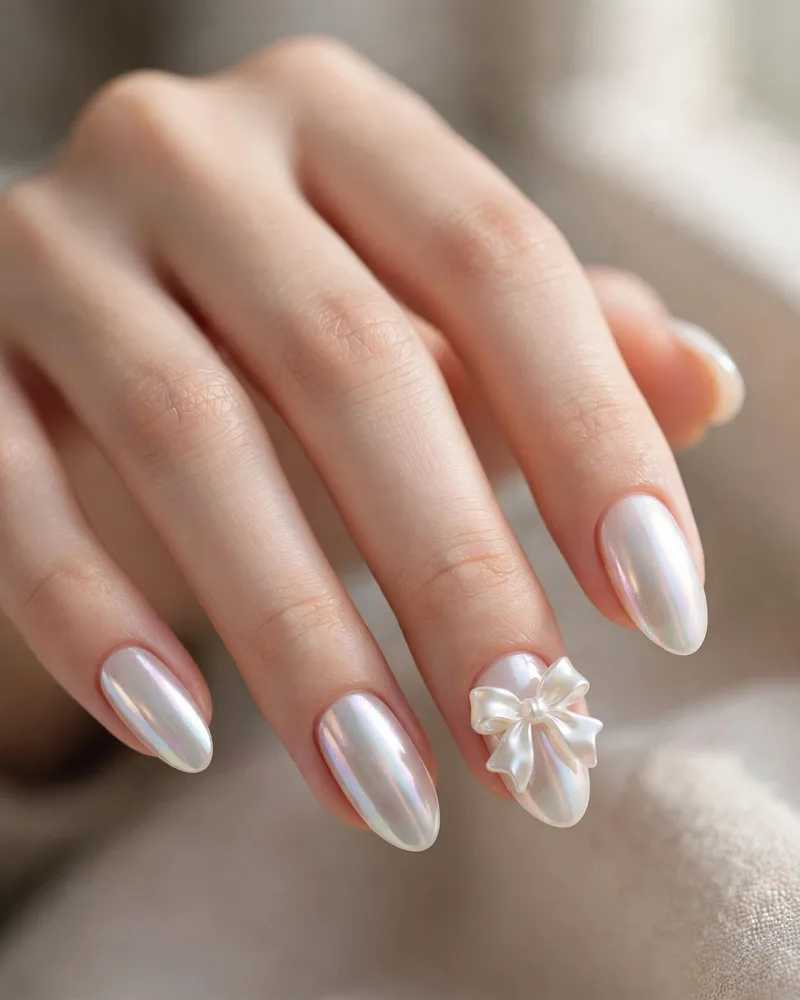
25. Pearl-core Minnie
A luminous pearl-chrome finish with a delicate 3D bow charm on the ring finger. The chrome shifts softly in the light, giving an expensive, dimensional glow. Keep charms small and sealed at the edges so they survive daily wear — this is the dressiest set in the lineup.
If you love themed sets like these, browse our acrylic nail designs roundup — many Disney looks hold up best on a sturdy acrylic base.
3 Easy Disney nail tutorials (step by step)
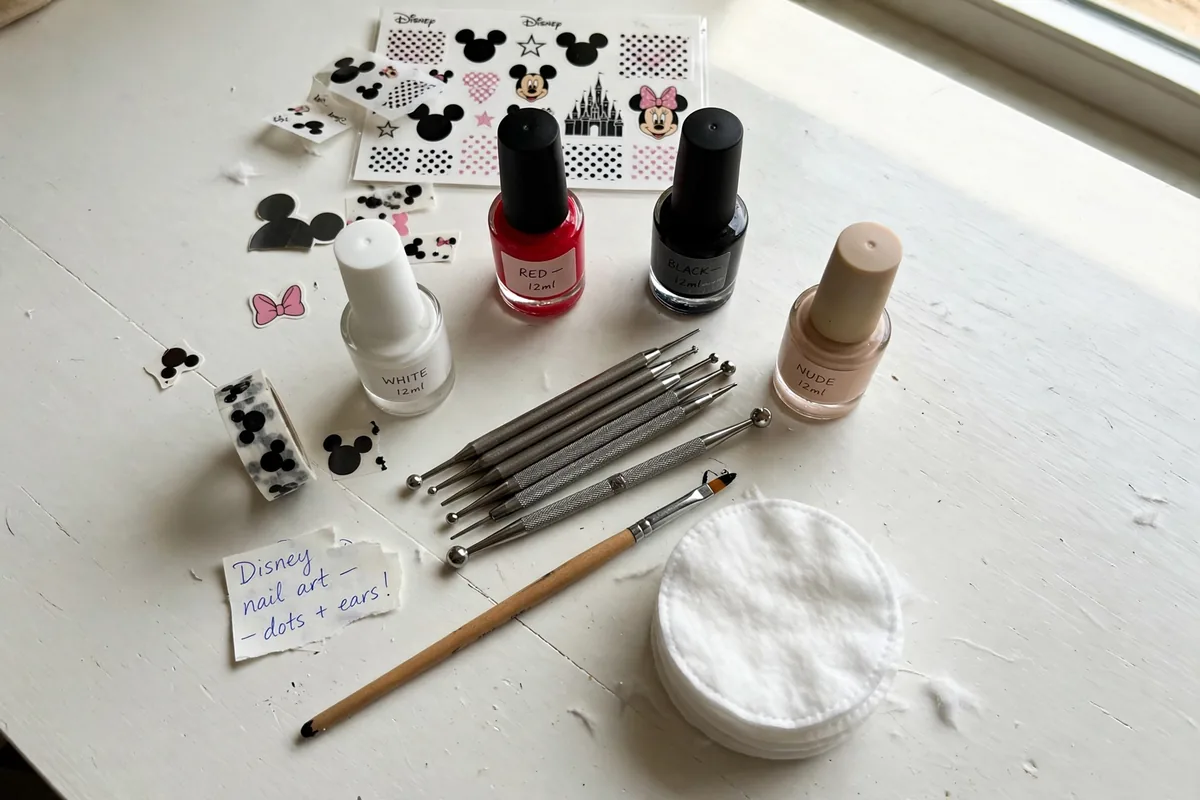
You do not need a salon for classic Disney nails. With a basic nail art kit — polishes, a dotting tool, and a thin brush — these three Disney nails tutorials take under 35 minutes each.
Tutorial 1: Mickey dot-head silhouette (20 minutes)
- Apply base coat and two coats of your background color (nude or red). Let dry fully.
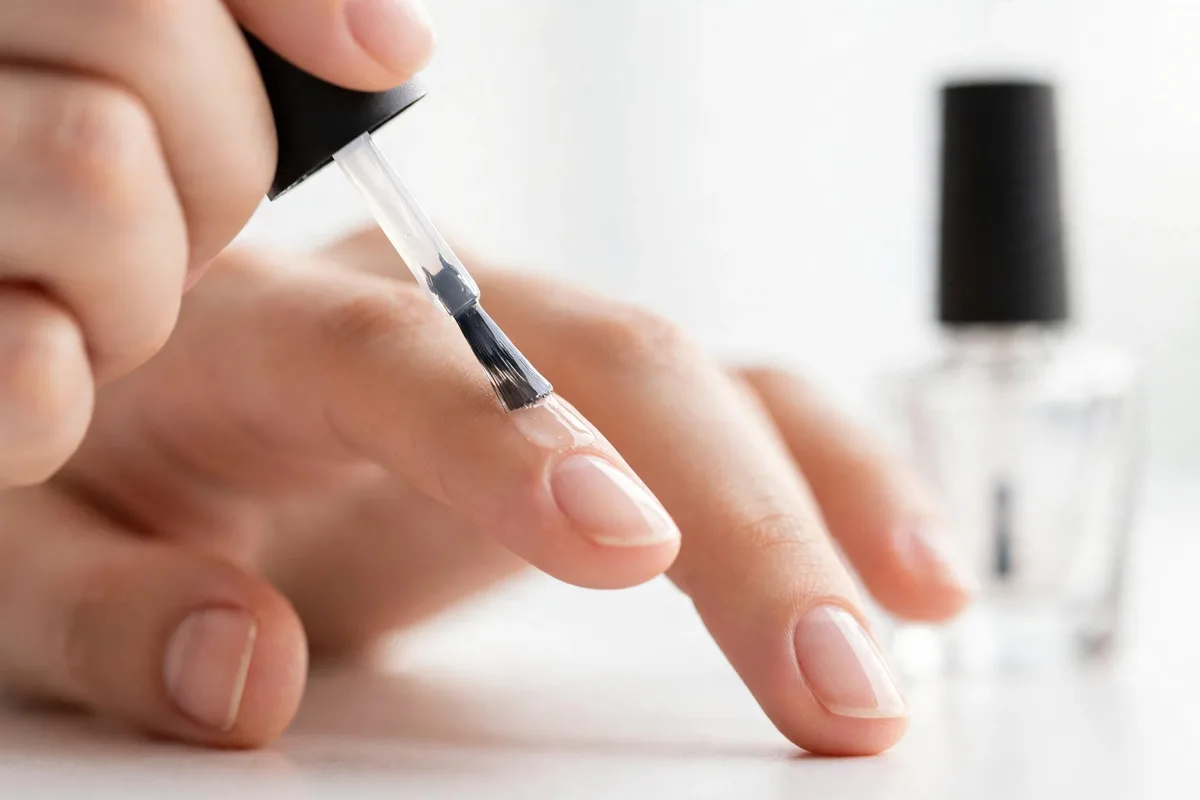
- Dip the large end of a dotting tool in black polish. Place one large dot near the tip of the nail — this is Mickey’s head.
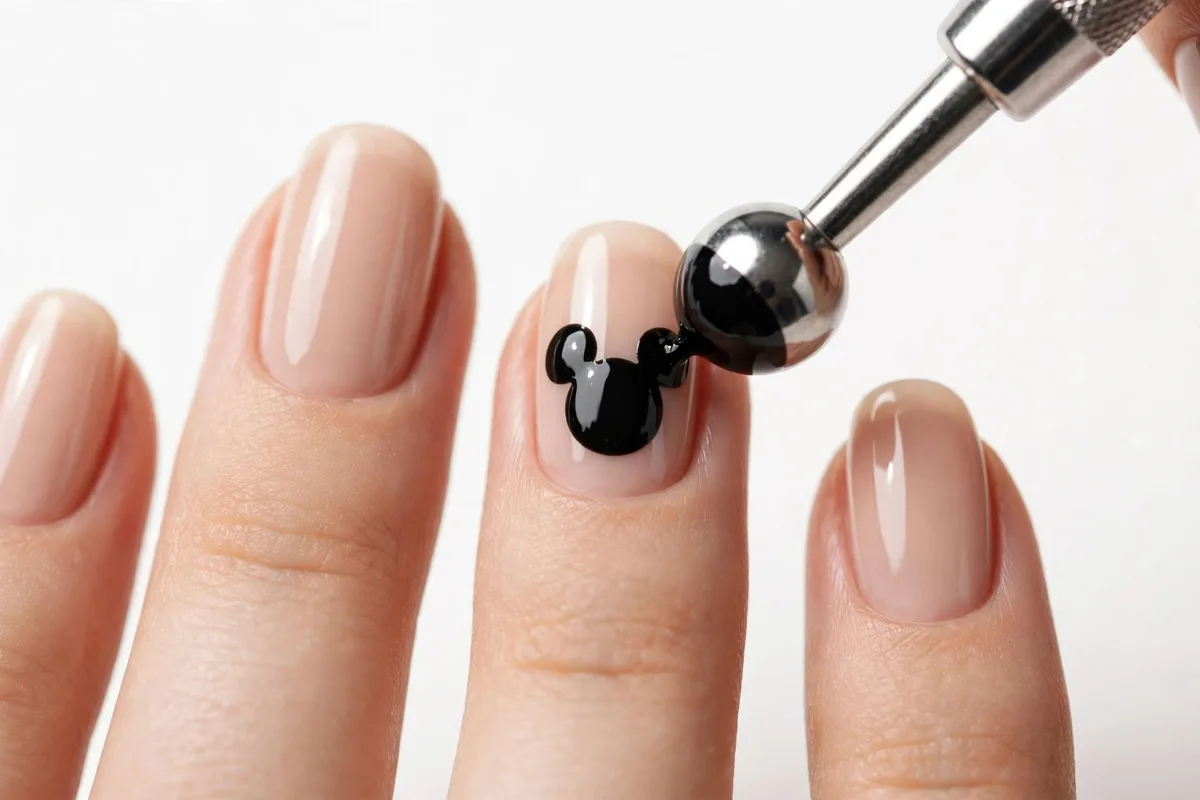
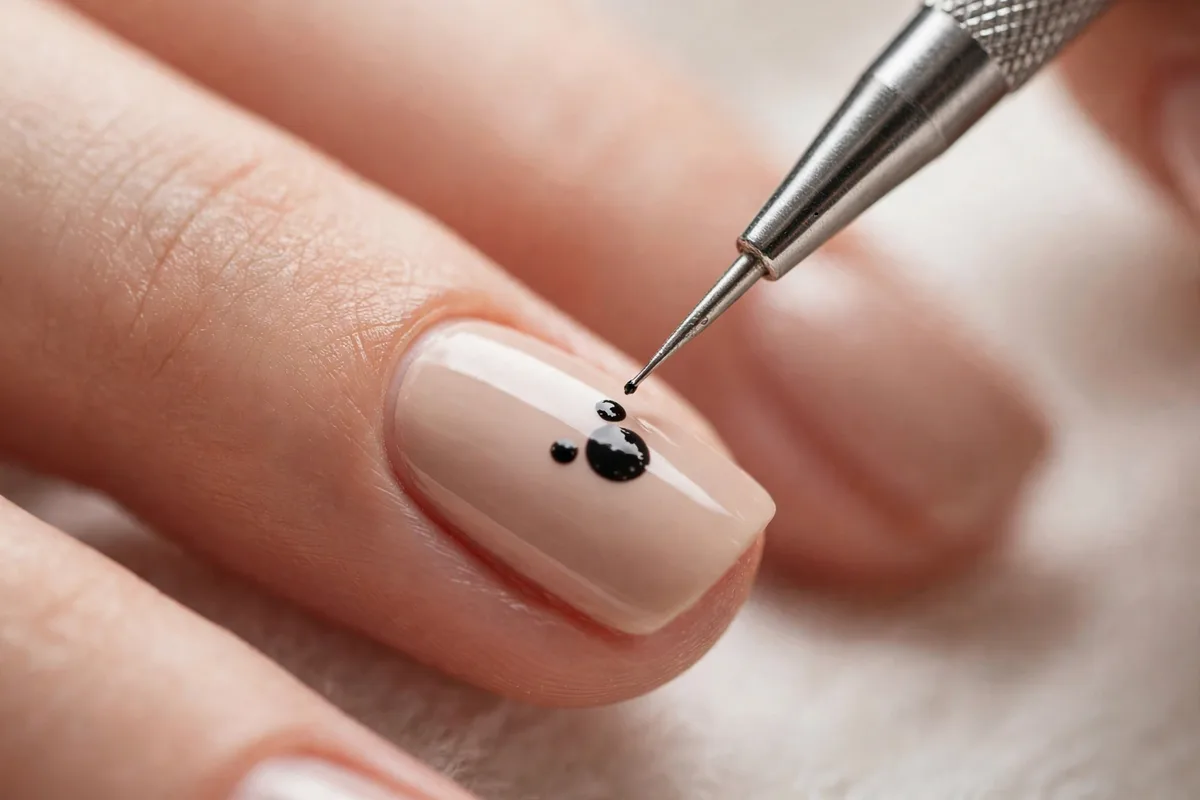
- With the small end of the dotting tool, add two smaller dots above the big one, angled outward — the ears.
- Clean up edges with a thin brush dipped in acetone.
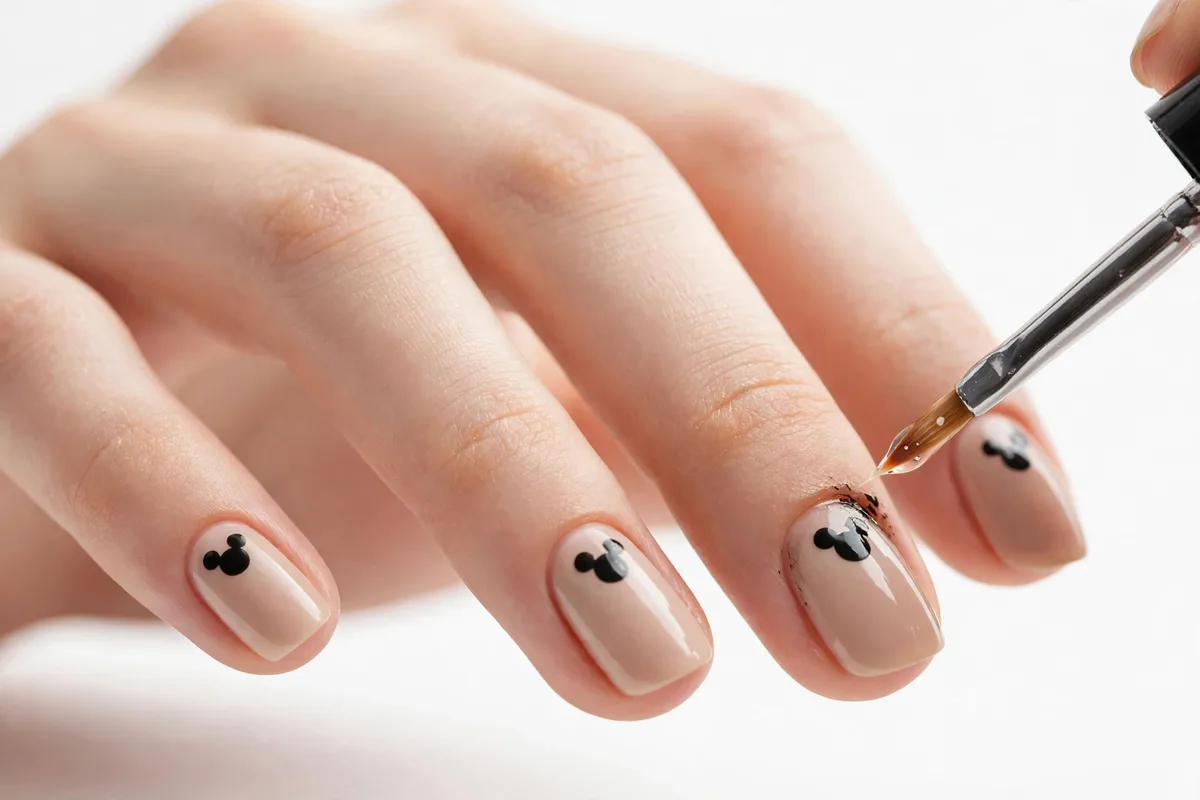
- Seal with top coat. Done — the most recognizable nail art on earth in four steps.
Tutorial 2: Minnie bow polka dots (25 minutes)
- Paint nails red (two coats) over base coat.
- With a dotting tool, add evenly spaced white dots across every nail except the ring finger.
- On the ring finger, paint a small white bow: two triangles tip-to-tip with a dot in the center, using a thin brush.
- Top coat everything. The bow is the only fiddly part — practice it once on paper first.
Tutorial 3: Hidden Mickey French tip (30 minutes)
- Do a standard French manicure: nude base, white tips.
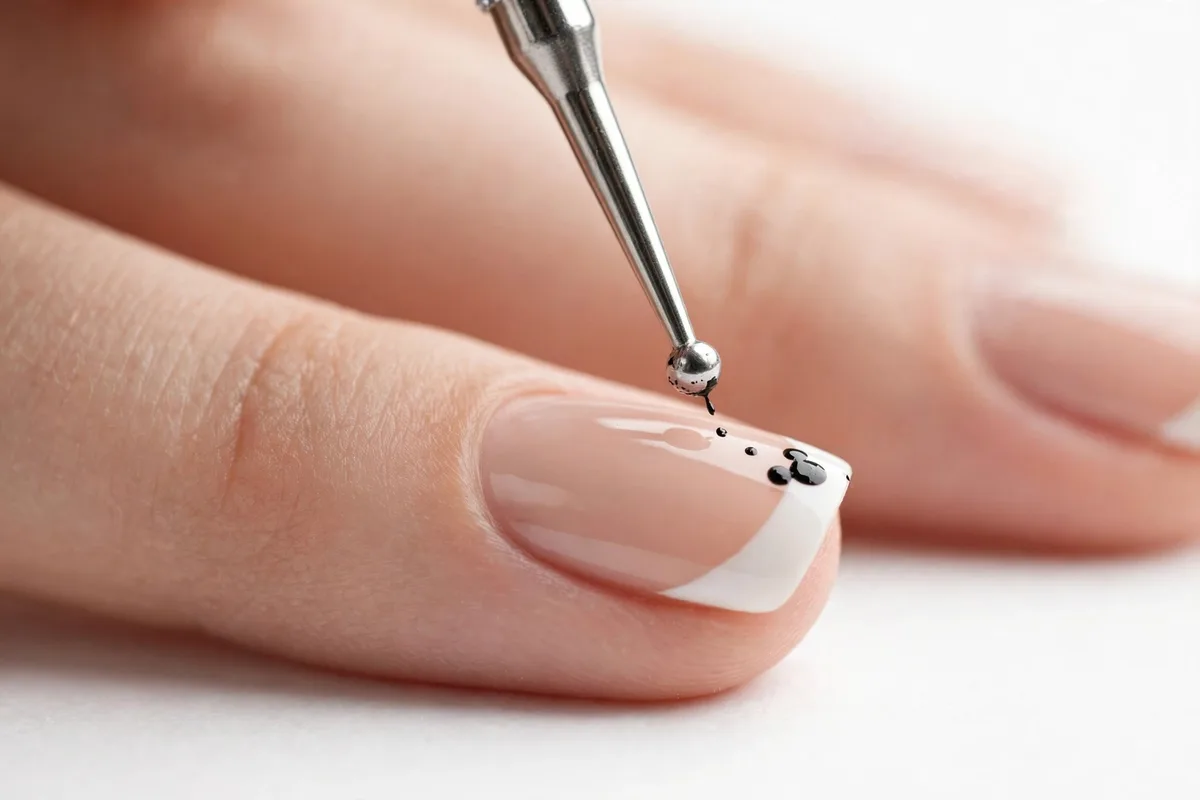
- On one nail, use the small end of a dotting tool to place a tiny Mickey head (one small dot + two micro dots) in black or gold at the corner of the tip.
- Keep it small — under 3mm reads as “hidden”, bigger reads as a logo.
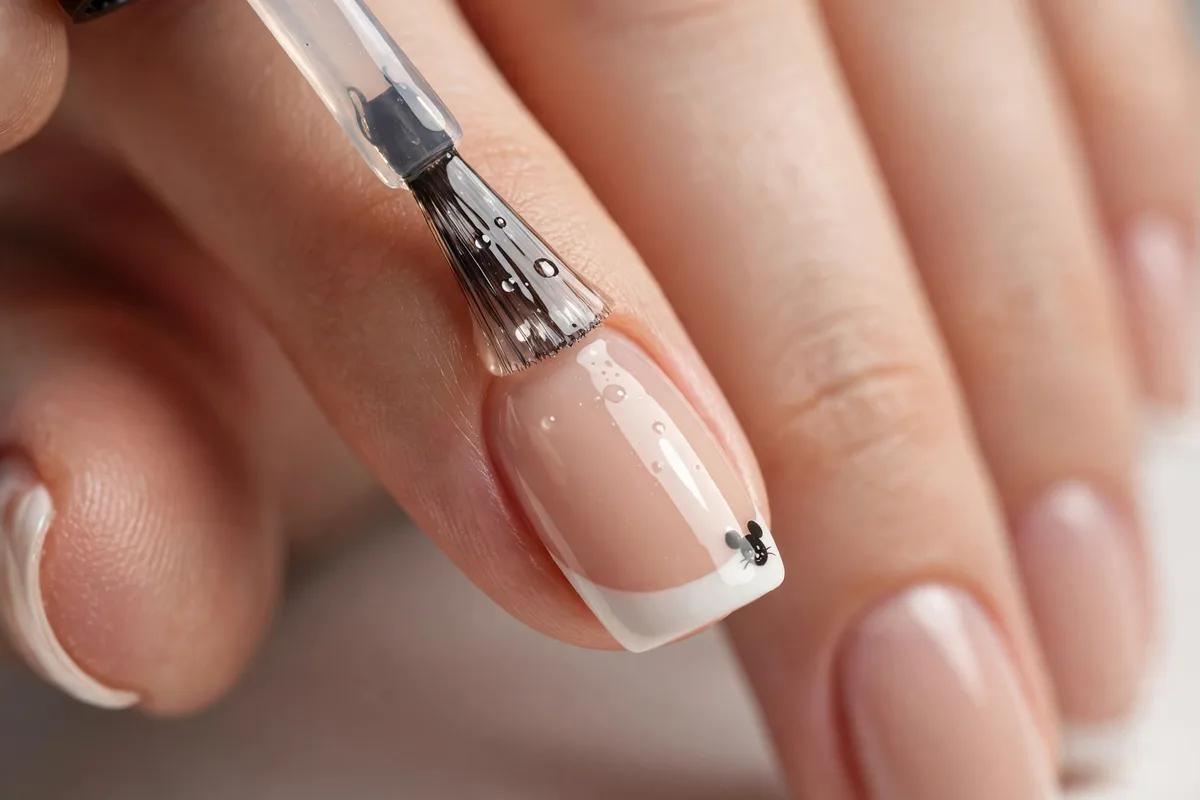
- Top coat. This is the design Disneybounders wear to the parks without looking costumey.
Disney nails for short nails
Short nails suit Disney nails built on dots, silhouettes, and French-tip variations — full character portraits need canvas you do not have, so skip those. The best Disney nails for short nails: Mickey dot-heads, Minnie polka dots, hidden Mickey French tips, Jack Skellington faces, and Toy Story clouds. Keep art to one or two accent nails and let the rest carry a solid coordinating color; a full set of busy art on short nails looks crowded.
Disney press-on nails worth buying
No time for hand-painting Disney nails? Licensed and handmade press-ons have caught up fast. What to look for: real customer photos (not renders), glue and adhesive-tab options, and a size range that includes narrow nail beds.
| Pick | What it is | Good for |
|---|---|---|
| Glamnetic × The Nightmare Before Christmas | Licensed almond-shaped press-ons with Jack and Sally art | Halloween trips, instant wear |
| Essie × Disney Snow White collection | 8 limited-edition shades (Seize the Crown, Brave and True, No Prince Needed, Just Take a Bite, and more) — polish, not press-ons, but made for Disney nail looks | DIY Disney manicures with official colors |
| Handmade Disney sets on Etsy | Custom character art painted to your nail sizes | Specific characters the big brands skip |
The Essie × Snow White shades are listed on essie.co.uk as a limited collection, so grab them while they are still in stock.
How to make your Disney nails last a full park trip
Park days are brutal on Disney nails: sunscreen, hand sanitizer, ride restraints, pool water. Make your Disney nails survive the whole trip:
- Prep like a tech: push back cuticles, lightly buff, and dehydrate the nail plate with alcohol before any polish. Lifting starts with skipped prep.
- Go gel or strips for trips: regular polish chips by day three. A gel manicure cured under LED lights or semi-cured gel strips routinely last 10–14 days of park wear.
- Cap the free edge: run base coat, color, and top coat slightly over the tip of the nail. This one habit prevents most chips.
- Pack a repair kit: your background color, a dotting tool, and top coat in a ziplock. A 5-minute fix beats a ruined set in every castle photo.
- Cuticle oil nightly: sunscreen and sanitizer dry out the skin around the art; oil keeps it from peeling.
Salon vs DIY: what Disney nails cost
At Walt Disney World, the Character Couture in-salon nail art upgrade (offered at spas in Disney’s Grand Floridian, Saratoga Springs, Wilderness Lodge, Coronado Springs, and Yacht & Beach Club resorts) runs from about $3 per nail up to $30 for a full set — charged on top of the manicure itself, with 100+ character designs to choose from.
DIY is far cheaper after the first buy: a dotting tool set, detail brush, and a few polishes cost roughly $15–25 total and cover dozens of manicures. The trade-off is time and steadiness — book the salon for detailed character portraits, DIY the dots, bows, and French-tip variations.
FAQs
How do you do Disney nails at home?
Start with the simplest designs: a Mickey dot-head needs only a dotting tool (one large dot, two small dots for ears), and Minnie polka dots need red polish plus white dots. Our step-by-step tutorials above cover three beginner designs that each take under 35 minutes with a basic nail art kit.
What Disney nail designs are trending in 2026?
The “classy, not costume-y” wave: glazed donut Mickey heads, cherry French tips with a hidden Mickey, pearl-core finishes, and jelly nails with tiny character decals. Villain sets (Maleficent, Ursula) spike every Halloween, and princess pastels dominate spring park trips.
Where can I buy Disney press-on nails?
Glamnetic sells a licensed Nightmare Before Christmas press-on set, Etsy makers offer custom hand-painted Disney sets in your exact sizes, and the Essie × Disney Snow White 8-shade polish collection gives you official Disney colors for DIY designs.
How long do Disney nail designs last?
Regular polish Disney art lasts 3–5 days of normal wear. For a week-long park trip, choose gel polish or semi-cured gel strips, which typically hold 10–14 days with proper prep — plus a top-coat refresh mid-trip.
Disney nails are the rare trend that works for everyone: toddlers get Toy Story clouds, teens get glazed donut Mickey, and adults get hidden-Mickey French tips nobody at the office will clock. Pick one design from the table, try a tutorial this weekend, and tag your castle selfie. For more inspiration, explore our nail aesthetic ideas and this season’s best nail polish colors.